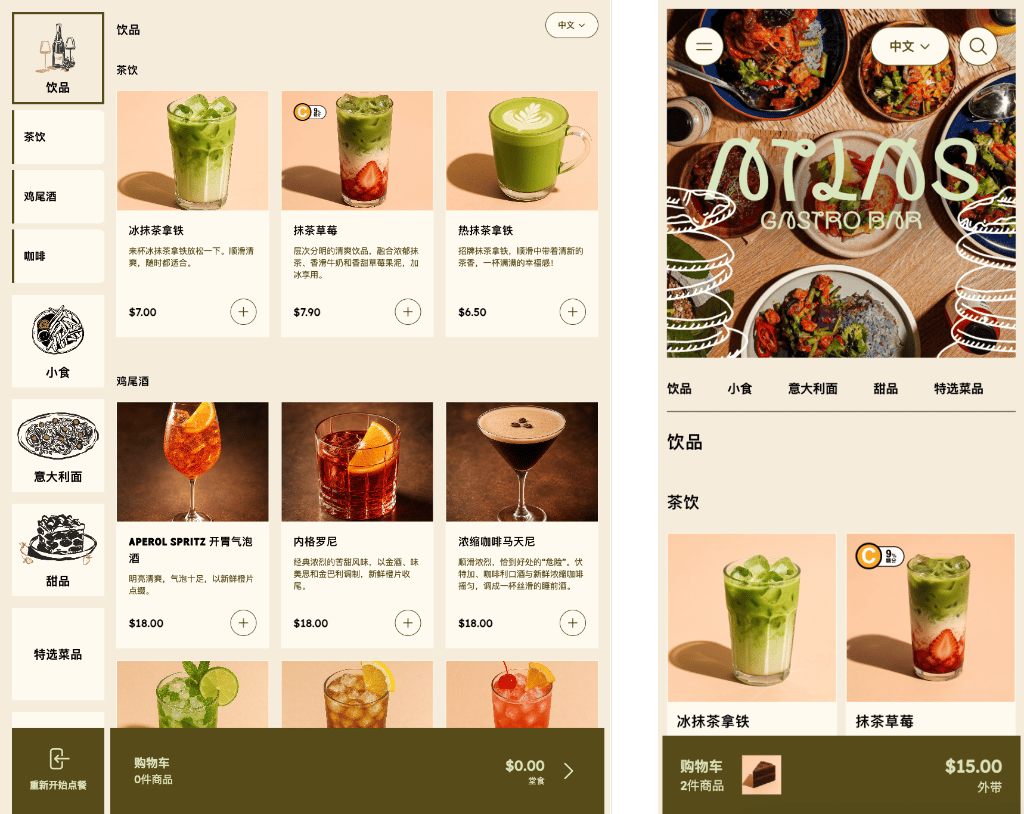
Diners see a language toggle on your online ordering website, scan-to-order (STO), and kiosk menus. They can switch the menu between English and Chinese (中文).You provide the Chinese text yourself. Download a translation sheet for your menu, fill in the Chinese columns, and upload it. Atlas shows the Chinese version when a diner picks 中文.
Kiosk and online ordering menus in Chinese, with the language toggle in the top right
In the Merchant Portal, open Menus. Find the menu you want to translate.
2
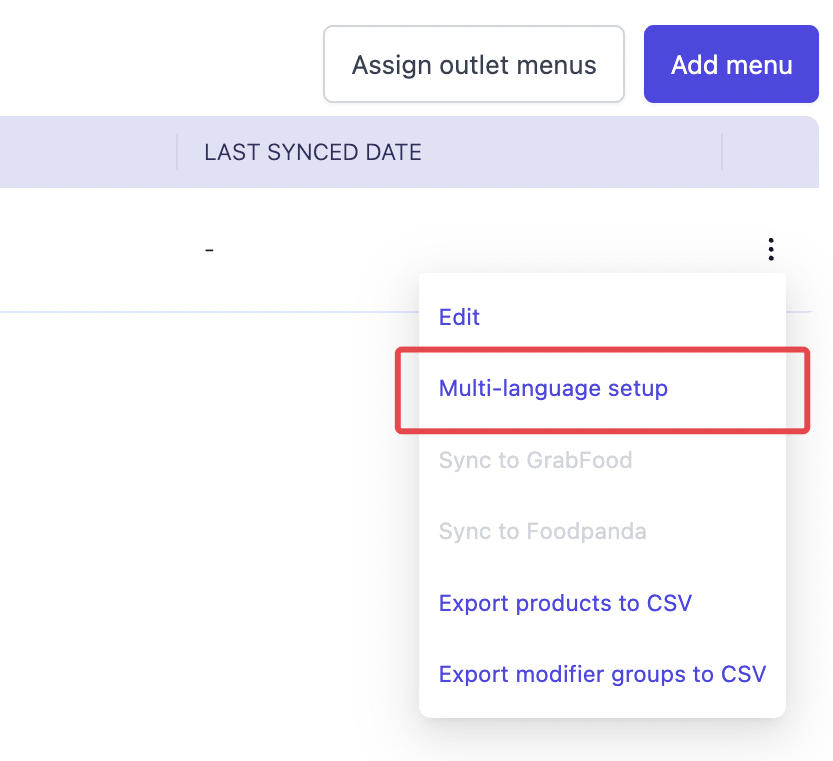
Open "Multi-language setup"
Tap the actions menu (⋮) on that menu’s row, then tap Multi-language setup.
Menu actions menu showing Multi-language setup
3
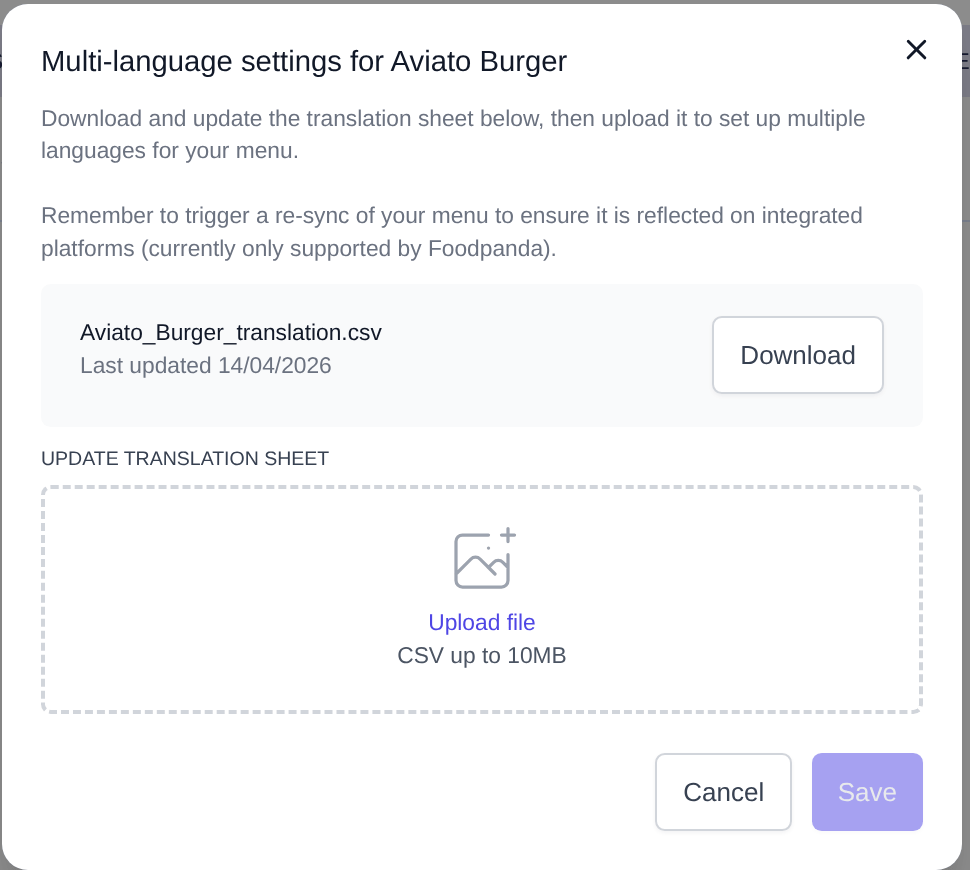
Download the translation sheet
Tap Download. You get a CSV file named after your menu (e.g. Dinner_menu_translation.csv). The modal also shows the date the sheet was last updated.
Multi-language settings modal with the translation sheet download and upload area
4
Fill in the Chinese columns
Open the CSV in Excel or Google Sheets. Every menu, section, item, and modifier group is a row.
Fill in Title (zh) with the Chinese name.
Fill in Description (zh) with the Chinese description, if the item has one.
Leave a cell blank to keep showing the default (English) text for it.
5
Upload the sheet
Back in the same modal, drag the CSV into the upload area or tap to browse, then tap Save.
Do not change the Source type and Source ID columns. Atlas uses them to match each row back to the right item. Also leave Title (default) and Description (default) unchanged unless you mean to rename the item itself. These columns overwrite the item’s real name and description everywhere, not just the translation.
How you turn on the toggle depends on the channel.Online ordering website: the toggle is switched on at the account level. Contact support at hello@atlas.kitchen to enable it.Scan-to-order and kiosk: turn it on yourself in the channel link settings.
1
Open your channel link
Go to Scan to Order or Kiosks, then open the channel link your menu is on for editing.
2
Turn on "Enable language toggle"
Scroll to Enable language toggle under General details and turn the switch on.
Enable language toggle switched on, revealing the Default language options
3
Pick a default language
Choose English or 中文 (Chinese). This is the language diners see first when they open the menu.
4
Save
Tap Save. The toggle appears on your menu within a few minutes.