Configure, add, or remove the payment types your business accepts. This guide covers enabling payment types (like credit card, PayNow, and cash), creating your own manual payment types, and assigning a specific subset of payment types to an individual outlet.
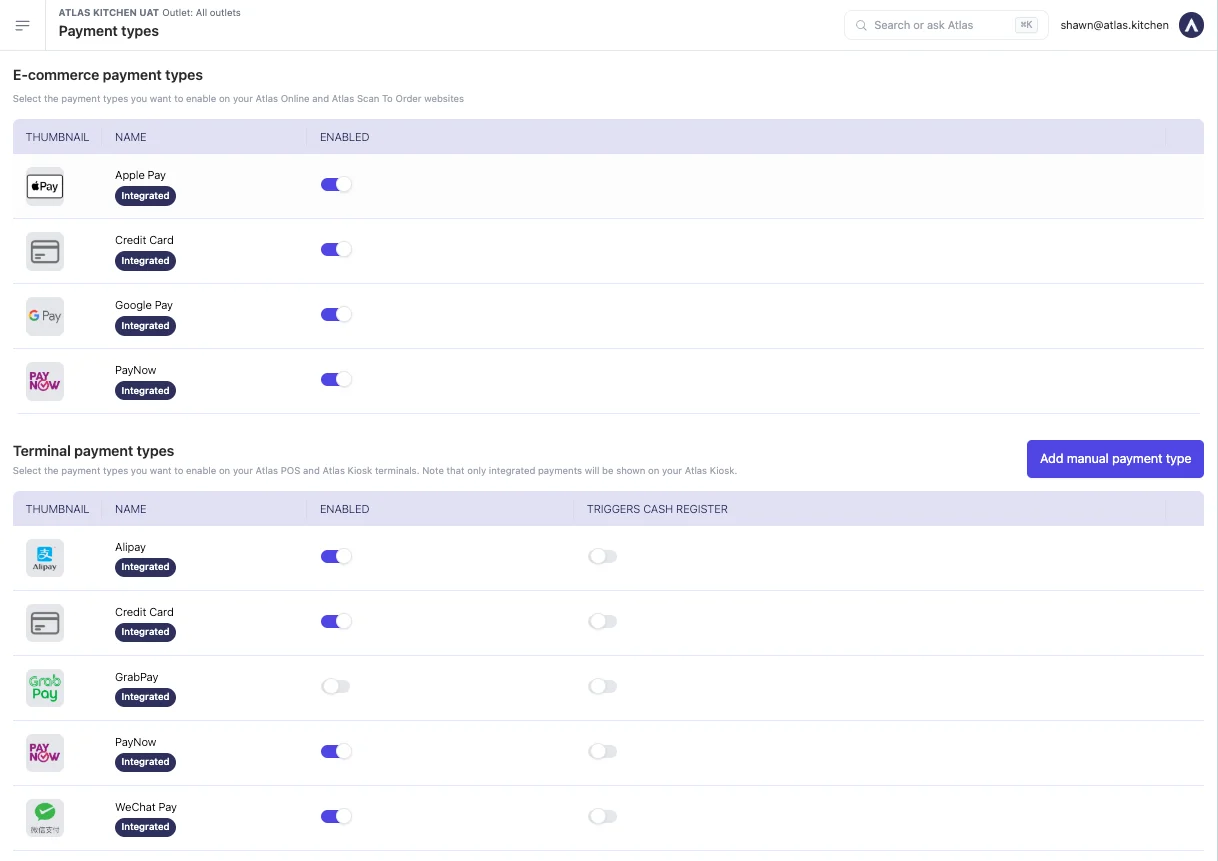
Turn on the payment types you want to accept. Payment types are grouped into E-commerce payment types (Atlas Online and Scan to Order) and Terminal payment types (Atlas POS and Kiosk).
1
Log in to the Atlas merchant portal.
Open your web browser and sign in to the dashboard.
2
Navigate to Payment types.
Go to Settings > Payment types.
Payment types settings page in the Atlas merchant portal
3
Find the right group.
Use the E-commerce payment types section for your Atlas Online and Scan to Order websites, or the Terminal payment types section for your Atlas POS and Kiosk.
4
Turn on the payment type.
Switch the Enabled toggle on next to the payment type you want to accept (e.g. Credit card, PayNow, or Cash).
Stop accepting a payment type at checkout. Payment types are disabled, not deleted — switching a type off removes it from the relevant checkout screens while keeping it available to re-enable later.
1
Navigate to Payment types.
In the Atlas merchant portal, go to Settings > Payment types.
2
Disable the payment type.
Find the payment type you want to stop accepting and switch its Enabled toggle off.
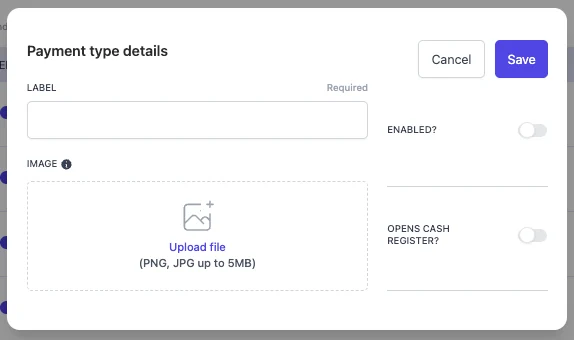
Create a custom payment type for things Atlas doesn’t provide out of the box — physical gift cards, mall vouchers, cash vouchers, or any custom tender you accept at the till.
1
Navigate to Payment types.
In the Atlas merchant portal, go to Settings > Payment types.
2
Click 'Add manual payment type'.
In the Terminal payment types section, click the Add manual payment type button.
3
Enter the payment type details.
Fill in the Label (required, e.g. “Mall voucher”). You can optionally upload an Image for the payment type.
Manual payment type creation form
4
Set the options.
Switch Enabled on so the payment type is available immediately. Switch Opens cash register? on if selecting this payment type at the POS should trigger the cash drawer.
5
Save.
Save the form. Your new payment type will now appear in the Terminal payment types list and on your POS checkout screen.
If a payment type is enabled in the Atlas merchant portal but doesn’t show at the till or online:
Check the group: Make sure you enabled it in the right section — Terminal payment types for POS/Kiosk, E-commerce payment types for Atlas Online/Scan to Order.
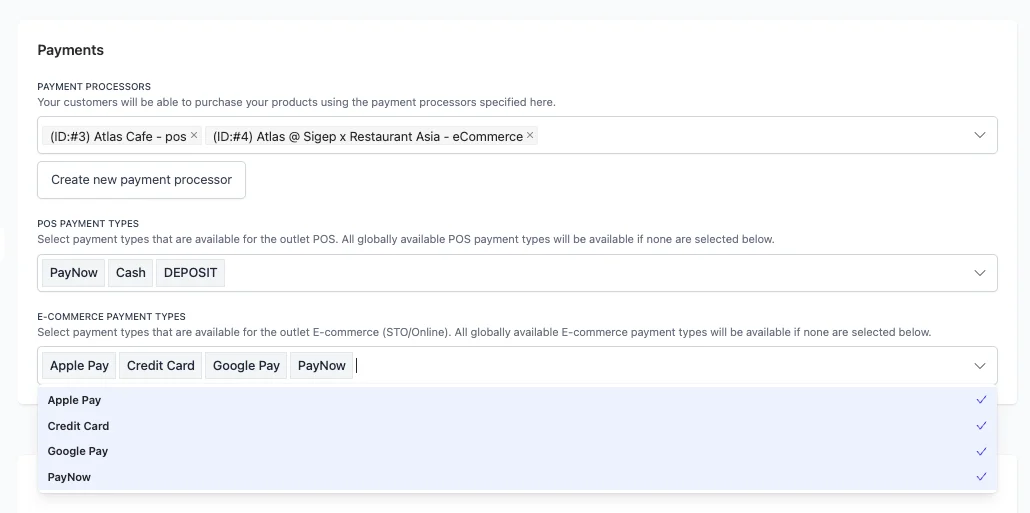
Check the outlet’s selection: If the outlet has specific payment types selected under Outlet settings > Outlets > (outlet) > Payment types, only those will show. Add the missing type, or clear the field to fall back to your global list.
Check your connection: Make sure the POS tablet is online.
Card terminal payment fails to connect
If an integrated card terminal isn’t responding, this is a hardware connection issue rather than a payment type setting. Check that the terminal is powered on and connected, then contact support if it persists.