Who is this article for?
- Atlas users with Finance or Admin permissions. Set permissions from Settings > Team members.
- Users who need to manually create orders for VIP customers, charge deposits, or add external orders.
Before you begin
Admin orders allow you to manually register and charge orders in Atlas for delivery, pickup, or dine-in. You can use this feature to charge VIP customers, collect deposits for future events, etc.Creating an Admin order
Follow these steps to create an Admin order:- Open the Atlas Merchant Portal and tap the ☰ menu to open the sidebar.
- Tap “All Orders”.
- Tap “Add Order” in the top-right corner.
- In the order creation screen, select:
- Outlet
- Fulfilment type (Delivery, Pickup, or Dine-in)
- Date & time
- Customer details
- Items to charge
- Tap “Create” in the top-right corner to finalise the order.
- Wait 2-3 seconds, then reload the page to see your order.
- Once you open the order again, it will show as Unpaid and it will have a red banner on top. Tap on “Make payment”.
- This will open a modal with three options to resolve the underpayment:
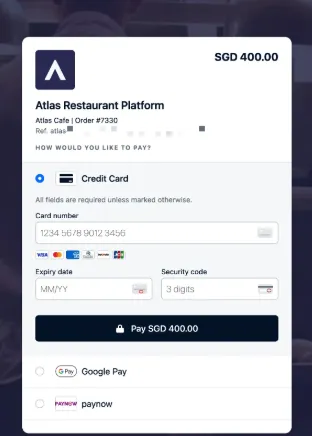
- **Option 1: Online payment link. **You will send an email to the customer for them to pay online the outstanding amount. The order must have the diner’s email assigned.
- Select this option > Tap “Continue”.
- Tap “Charge”, and an email will be sent to the diner’s email, for them to pay online.
- After paid, the order will update with the new payment.
- **Option 2: Payment terminal. **You must own an Atlas payment terminal to use this. You will trigger a payment on the terminal, for customer to pay in-person.
- Select this option > Tap “Continue”.
- Tap the “Select terminal to charge” dropdown, and select your current station.
- Tap “Payment type” dropdown, and select the correct payment type.
- Tap “Charge payment”.
- Option 3: Manual payment.
- Select this option > Tap “Continue”.
- Tap “Payment type” dropdown, and select the correct payment type.
- Tap “Update”.
- **Option 1: Online payment link. **You will send an email to the customer for them to pay online the outstanding amount. The order must have the diner’s email assigned.
Retrieving the payment link for an Admin order
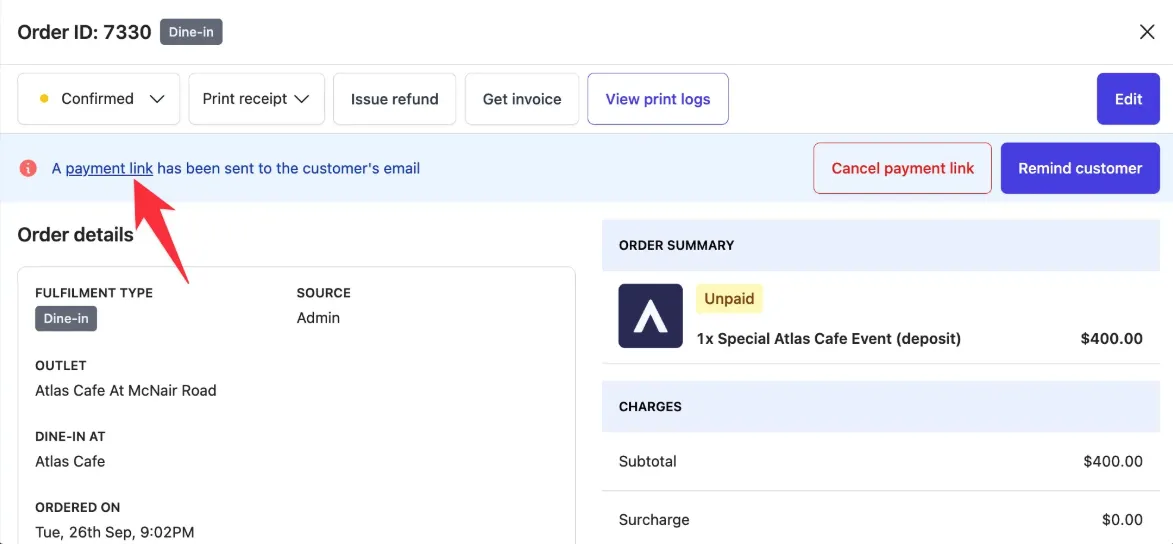
- Open the order details page.
- Click the Payment Link (underlined text) to copy the link.
- Share the link via WhatsApp, SMS, or any other communication channel.
Confirming payment for an Admin order
Once the customer completes the payment:- The order status will change from Unpaid to Paid.
- The order details modal will show the payment reference at the bottom.
What should happen
After completing the steps above:- The Admin order appears in “All Orders” with the correct items, customer details, and serving time
- If using online payment link: The customer receives an email with a payment link
- If using payment terminal: The terminal displays the payment amount and processes the card
- If using manual payment: The order status changes to Paid immediately
- The order status changes from “Unpaid” (red banner) to “Paid” once payment is completed
If it doesn’t work
Order doesn't appear after creating
Order doesn't appear after creating
- Refresh the page (tap the browser refresh button or pull down on mobile)
- Check the date filter at the top of the Orders page — ensure it includes the order’s serving date
- Check that you selected the correct outlet when creating the order
- Wait a moment and refresh again — there may be a brief delay
Customer didn't receive the payment email
Customer didn't receive the payment email
- Check that the order has a valid email address in the customer details
- Ask the customer to check their spam/junk folder
- Copy the payment link manually from the order details page and send via WhatsApp or SMS
Payment terminal doesn't show the charge
Payment terminal doesn't show the charge
- Ensure the terminal is powered on and connected to WiFi
- Verify you selected the correct terminal from the dropdown
- Tap “Charge payment” again — the first attempt may have timed out
- If the terminal still doesn’t respond, use manual payment instead and contact support
Order still shows 'Unpaid' after customer paid
Order still shows 'Unpaid' after customer paid
- Refresh the page and wait 30 seconds for the payment to sync
- For online payments: Check if the customer completed all steps on the payment page
- For terminal payments: Verify the terminal displayed “Approved” after the transaction
- Contact support at hello@atlas.kitchen if the issue persists
Next steps
- Process refunds — Learn how to refund Admin orders if needed
- Edit order details — Modify items, customer info, or delivery address
- View reports — Track Admin order sales in your reports