Discounts let you reduce the price of an order or specific items. You can use discounts to run promotions (“20% off this weekend”), reward customers (“free delivery for members”), or handle service recovery (“complimentary dessert”).Once you create a discount, customers can apply it using a promo code at checkout, or your staff can apply it directly from the POS.
These discounts reduce the total price of an order.
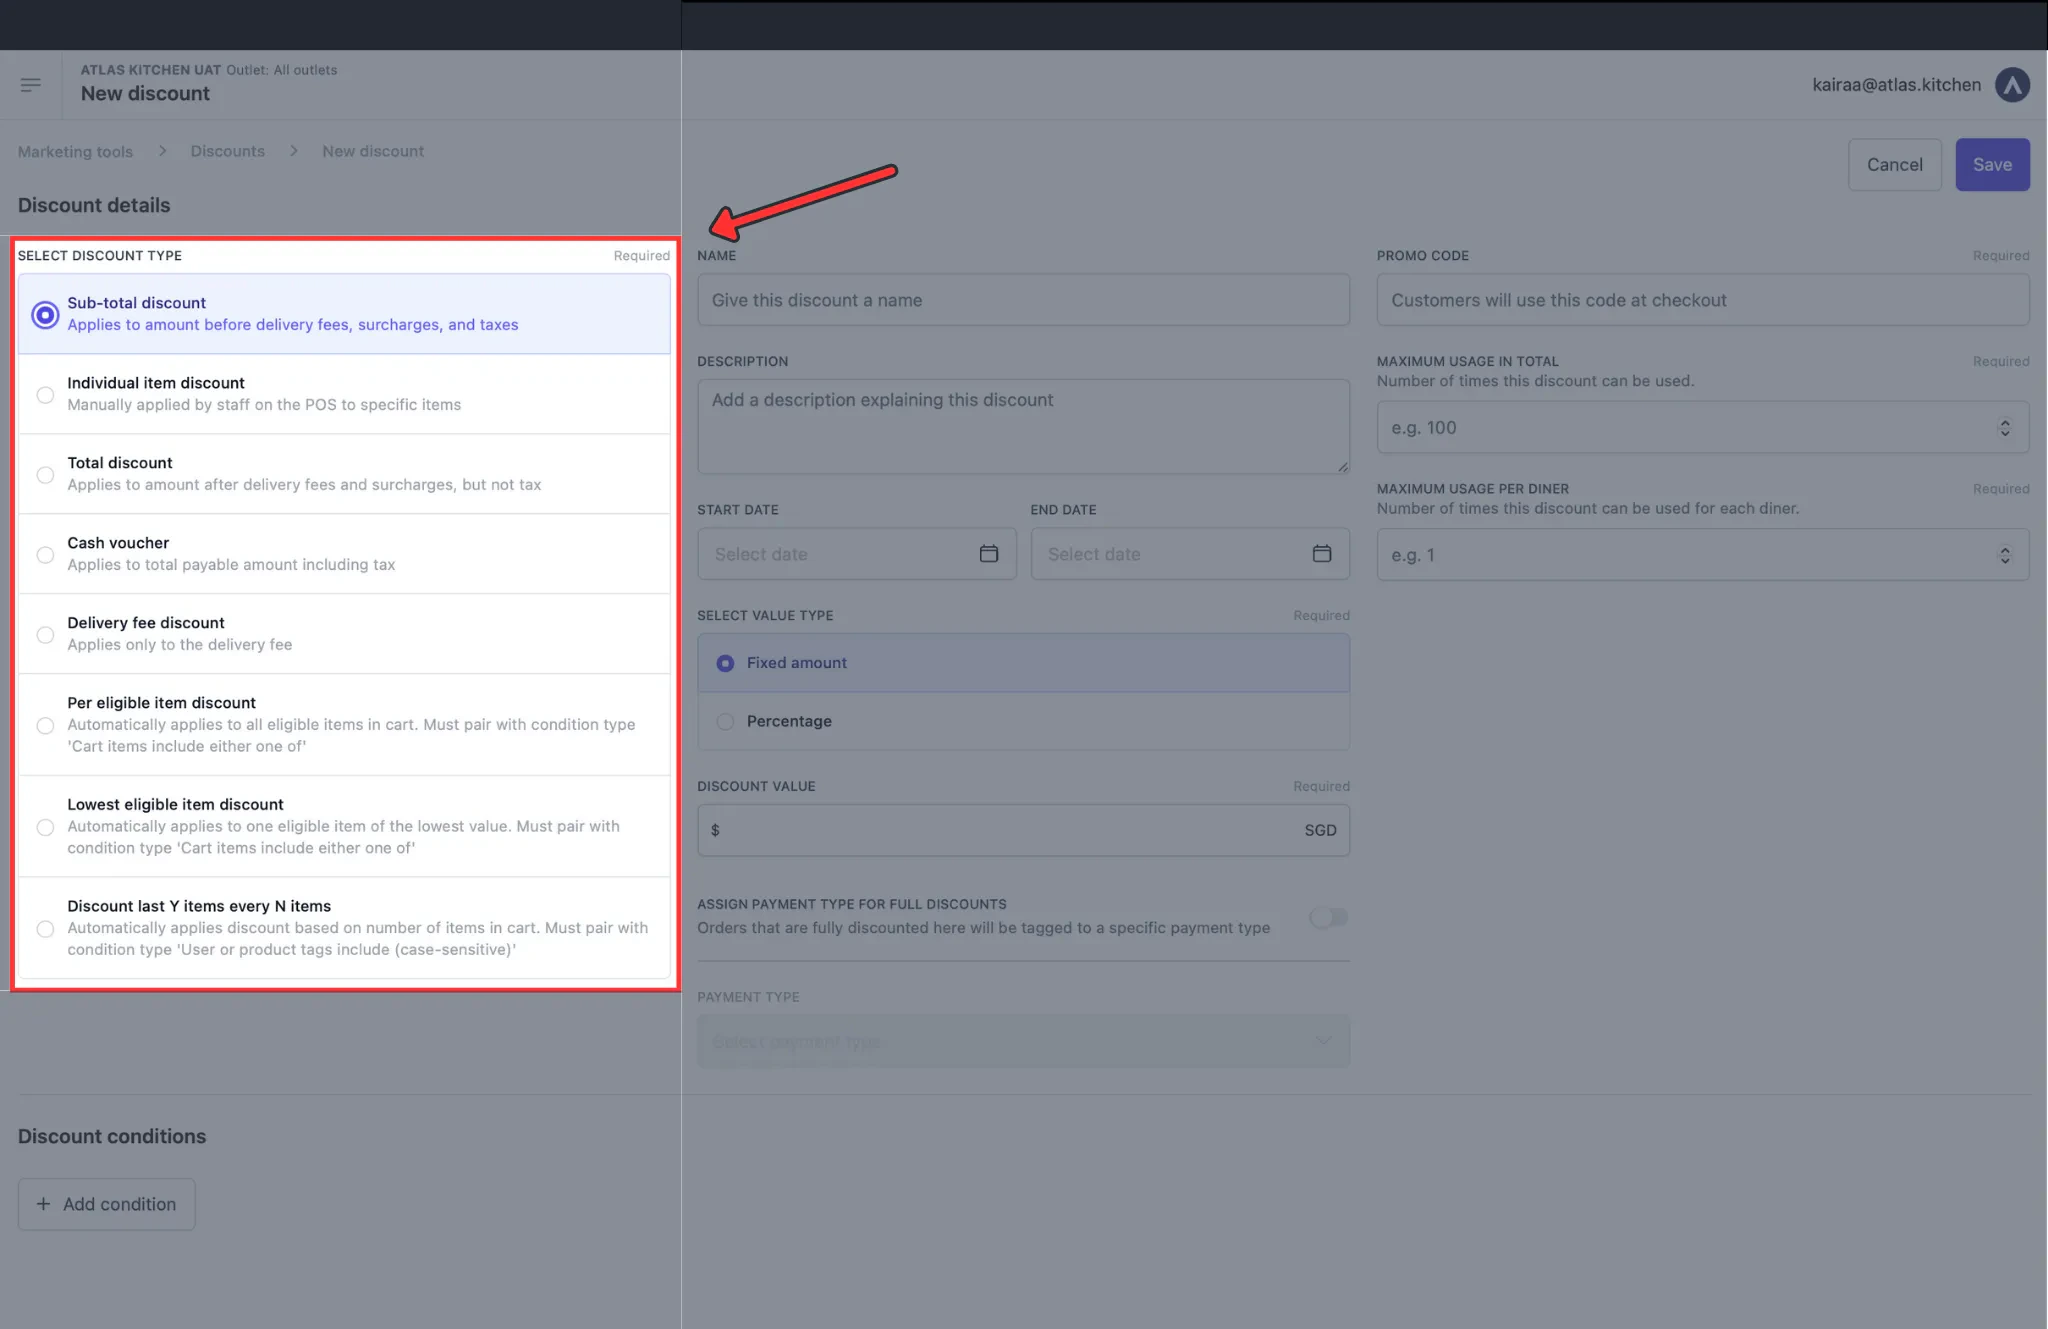
Sub-total discount is the most common choice. It reduces the order amount before delivery fees, surcharges, and taxes are added. Use this for most promotions like “$5 off orders over $30” or “15% off your order”.
Total discount reduces the order amount after fees and surcharges, but before tax. Use this when you want the discount to apply to surcharges too.
Cash voucher reduces the final payable amount, including taxes. This works like a gift card — a $20 voucher covers exactly $20 of the final bill.
Delivery fee discount reduces or removes the delivery fee. Use this for delivery promotions like “Free delivery for orders over $25”.
These discounts reduce the price of specific items rather than the whole order.
Individual item discount lets staff manually select which item to discount at the POS. Useful for service recovery when a manager wants to comp a guest’s appetizer.
Per eligible item discount automatically discounts all items that match your criteria. For example, “20% off all desserts” discounts every dessert in the cart.
Lowest eligible item discount automatically discounts only the cheapest item that matches your criteria. For example, “Cheapest pizza free when you order 3 or more”.
Discount last Y items every N items is for buy-one-get-one promotions. Set Y=1 and N=2 to create a “Buy 1 beer, get 1 free” deal.
Note that Per eligible and Lowest eligible discounts must be paired with the condition “Cart items include either one of”. And Last Y every N discounts must be paired with “User or product tags include”. See Discount conditions for details.
Generally, you cannot stack multiple order-level discounts together. However, you can combine one order-level discount with one Individual item discount (applied only from the POS) on the same order.
The Name is shown to customers on receipts and at checkout. Use clear, promotional names like “Weekend Special 20% Off”.The Description is for internal notes only — your team can see it but customers can’t. Use it to note campaign details like “Summer 2024 marketing campaign”.
Choose a Value type of either Fixed amount (e.g., $10 off) or Percentage (e.g., 20% off). Fixed amounts work well for vouchers, while percentages work better for promotions.Enter the Discount value — the amount or percentage to discount.For percentage discounts, set a Value cap to limit how much customers can save. For example, “20% off up to $15” prevents large orders from getting excessive discounts.
Set the Redemption start date to schedule when customers can start using this discount. This lets you set up future promotions in advance.Set the Redemption end date to make the discount expire automatically. Always set an end date to avoid forgotten active discounts running indefinitely.
The Promo code is what customers enter to apply the discount. Use memorable codes like WELCOME10 or FREEDELIVERY.If you leave the promo code blank, the discount becomes POS-only — staff can apply it from a discount tile without needing a code. This is useful for manager discretion discounts or service recovery.
Maximum usage in total limits how many times this discount can be redeemed across all customers. Use this for exclusive promotions like “First 100 customers only”.Maximum usage per diner limits how many times each customer can use this discount. Set to 1 for “one per customer” offers.Limit usage by mobile number counts every order from the same mobile number against Maximum usage per diner — even across different accounts or guest checkouts. This stops a customer resetting a “one per customer” offer by signing up again with a new email.This is turned on by default for new discounts. It also applies to bulk discount codes.Turn it off for discounts where people share a number — for example a family on one phone number, or a customer who is assigned a recycled number that already used the code. With it off, Atlas counts usage per account instead.
The Limit usage by mobile number toggle in a discount's usage limits
With Limit usage by mobile number on, Atlas tracks per-customer usage by phone number, even for guests who don’t log in. To tie usage to a logged-in account instead, add the “User is registered” condition.
Assign payment type for full discounts tags fully comped items (100% off) with a specific payment type. This helps with accurate reporting on complimentary items.Discount modifiers determines whether add-ons and modifiers are included in the discount. Turn this OFF for promotions like “1-for-1 oysters” so premium toppings aren’t free too.Max redemptions per use limits how many times a “Last Y every N” discount triggers per order. Set to 1 to prevent “buy 10 get 5 free” — you probably just want one free item per order.
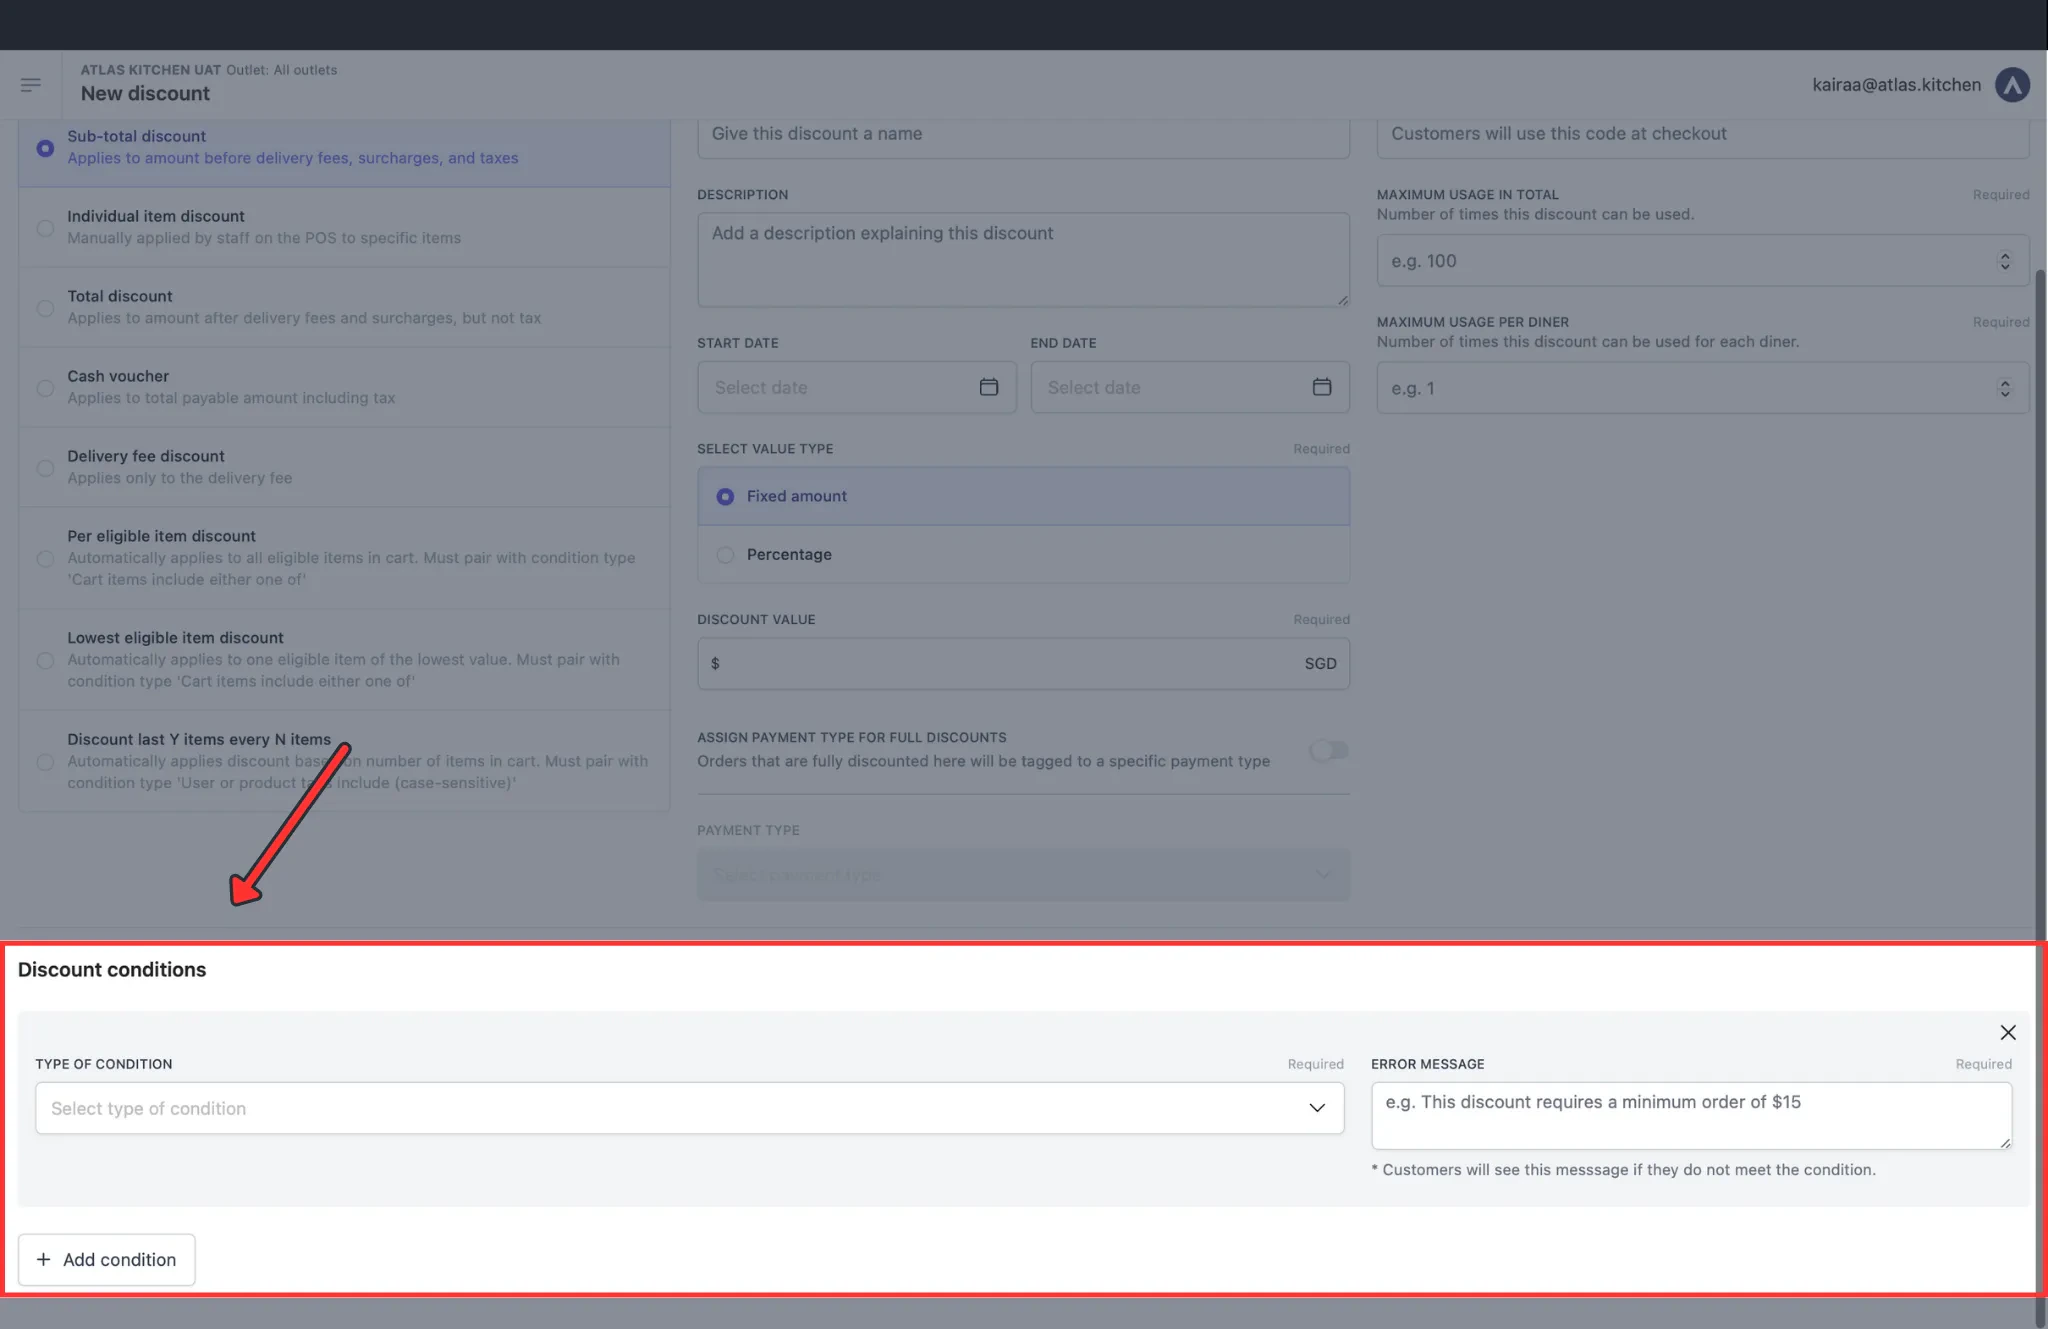
Conditions let you specify exactly who can use a discount, what needs to be in the cart, and when it’s valid. Add conditions by clicking ”+ Add condition” at the bottom of the discount form.
User is registered requires customers to log into their account before they can use the discount. This is required if you want to track usage per customer or limit redemptions per person.
User has an account checks if the customer has an account with your loyalty program. Use this for member-exclusive discounts.
User’s email domain contains checks if the customer’s email matches a specific domain. For example, use @yourcompany.com to create a staff discount that only employees can use.
Number of orders is less than checks the customer’s order history. Set this to 1 to create a “first order only” promotion — only customers who haven’t ordered before can use it.
Cart items include either one of requires at least one of the specified items to be in the cart. This is required for Per eligible and Lowest eligible item discounts.
Cart items include all of requires all specified items to be in the cart. Use this for bundle deals like “Buy burger AND fries, get free drink”.
Cart items exclude all of blocks the discount if any of the specified items are in the cart. Use this to exclude alcohol from a general discount.
Cart total minimum spend requires the order to meet a minimum value. Use this for promotions like “$5 off when you spend $30”.
Website is limits the discount to specific websites. Use this if you run multiple brands and want different promotions for each.
Outlet is limits the discount to specific locations. Use this for grand opening promotions at a new outlet.
Fulfilment type is limits the discount to specific order types (dine-in, takeaway, delivery). Use this for promotions like “Free delivery” that should only work for delivery orders.
Serving date is between makes the discount valid only during specific dates. Use this for holiday promotions like “Valid Dec 1-25”.
Serving day of the week is makes the discount valid only on specific days. Use this for promotions like “Monday Blues 20% Off”.
Serving time is between makes the discount valid only during specific hours. Use this for happy hour promotions like “5-8pm only”.
Serving date (calendar month) matches the customer’s birth month. Use this for birthday rewards — the discount only works during the month of the customer’s birthday.
User or product tags include is the most flexible way to target discounts. Instead of selecting items one by one, tag your products in Menu Builder (e.g., “happy-hour”, “alcoholic”, “desserts”). Then use this condition to target all tagged items with a single discount.
This makes maintenance easier — when you add new drinks to happy hour, just add the tag instead of updating every discount.
Customers can use promo codes on Atlas Online, Kiosk, and Scan to Order by entering the code at checkout.On POS, staff can either enter the promo code or tap a discount tile (if you’ve added one to the POS layout).Promo codes don’t work on third-party platforms like GrabFood, Deliveroo, or other aggregators. Those platforms have their own promotion systems.
Test before launching by placing a small test order to verify the discount works as expected.
Use clear names so staff instantly understand what “Weekend 20% Off” means without checking the details.
Set end dates to avoid forgotten discounts running indefinitely.
Cap percentage discounts to protect your margins on high-value orders.
Per-customer limits work by mobile number — “Max 1 per customer” counts repeat orders from the same phone, even for guests. Add “User is registered” if you want to tie it to a logged-in account instead.
Archive old discounts instead of leaving expired ones in the Active tab. This keeps your list clean and makes it easier to find current promotions.
Most “my code won’t apply” problems come down to a condition the order doesn’t meet. Check these first.
Minimum spend not met — the order is below the discount’s Cart total minimum spend. Ask the customer to add items.
Wrong fulfilment type — the discount has a Fulfilment type is condition (for example, delivery only) that the order doesn’t match.
Wrong items in the cart — the discount needs specific items or tags (Cart items include either one of or User or product tags include), or it’s blocked by Cart items exclude all of.
Outside the valid dates or times — the order falls outside the Redemption start/end date, Serving day of the week, or Serving time conditions.
Usage limit reached — the code hit its Maximum usage in total, or the customer hit Maximum usage per diner. Per-customer limits count by mobile number, so the same phone hits the cap across different accounts. If a customer is wrongly blocked (shared or recycled number), switch off Limit usage by mobile number on that discount.
Discount skips add-ons — if the discount isn’t covering modifiers, turn Discount modifiers on. When it’s off, only the base item price is discounted.
Two order-level discounts clash — you can’t stack two order-level discounts on one order. Only one order-level discount plus one POS individual item discount can combine. Remove the other discount first.
Staff can’t find the discount on POS — add it as a tile in Menu Builder > POS layout. Discounts with no promo code are POS-only and need a tile.
Discount not working at checkout — check if it has been archived (look in the Archived tab), expired, or reached its usage limit.
Discount not showing in the list — check which tab you’re on (Active vs Archived). Check if any filters are hiding it — look for a badge on the Filters button and click Clear all to reset.
Cannot archive or unarchive — you need Admin permissions. Check your role in Settings > Team members.
Bulk archive not responding — make sure you’ve selected at least one discount using the checkboxes. The toolbar only appears when discounts are selected.
Archived code still working — this shouldn’t happen. If a customer can still redeem an archived code, contact support at hello@atlas.kitchen with the promo code and order number.