- Mode A: QR pairing with WeChat.
- Mode B: Manual pairing via browser (recommended).
Mode A: QR pairing with WeChat
Mode A: QR pairing with WeChat
- Connect to the outlet’s WiFi network (must be 2.4GHz).
- Download WeChat and create an account.
- Locate the small black button at the back of the printer.
- Press and hold the button for 2 seconds and release → A receipt will print.
- Repeat step 4 → A receipt will print with a QR code.
-
Open WeChat and scan the QR code.
- Note: This connects the printer to WiFi.
- Enter your WiFi password and confirm.
- Note: Ensure Bluetooth and Local Network access are enabled if needed.
- On the next screen, select the Printer network and tap Connect.
- Wait for the printer to connect and print a success receipt.
- If the connection failed receipt prints, repeat the steps or check your WiFi stability.
Mode B: Manual pairing via browser (use phone, tablet, or laptop)
Mode B: Manual pairing via browser (use phone, tablet, or laptop)
With the printer powered on, locate the small black button at the back of the printer.
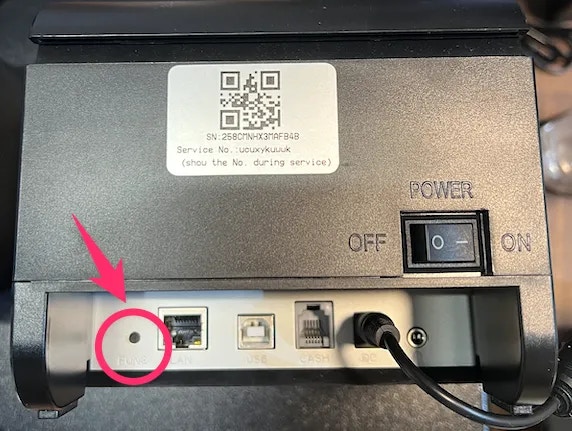
Button is very small — see the image above
Press and hold the button for 2 seconds, then release → A receipt will print with two options
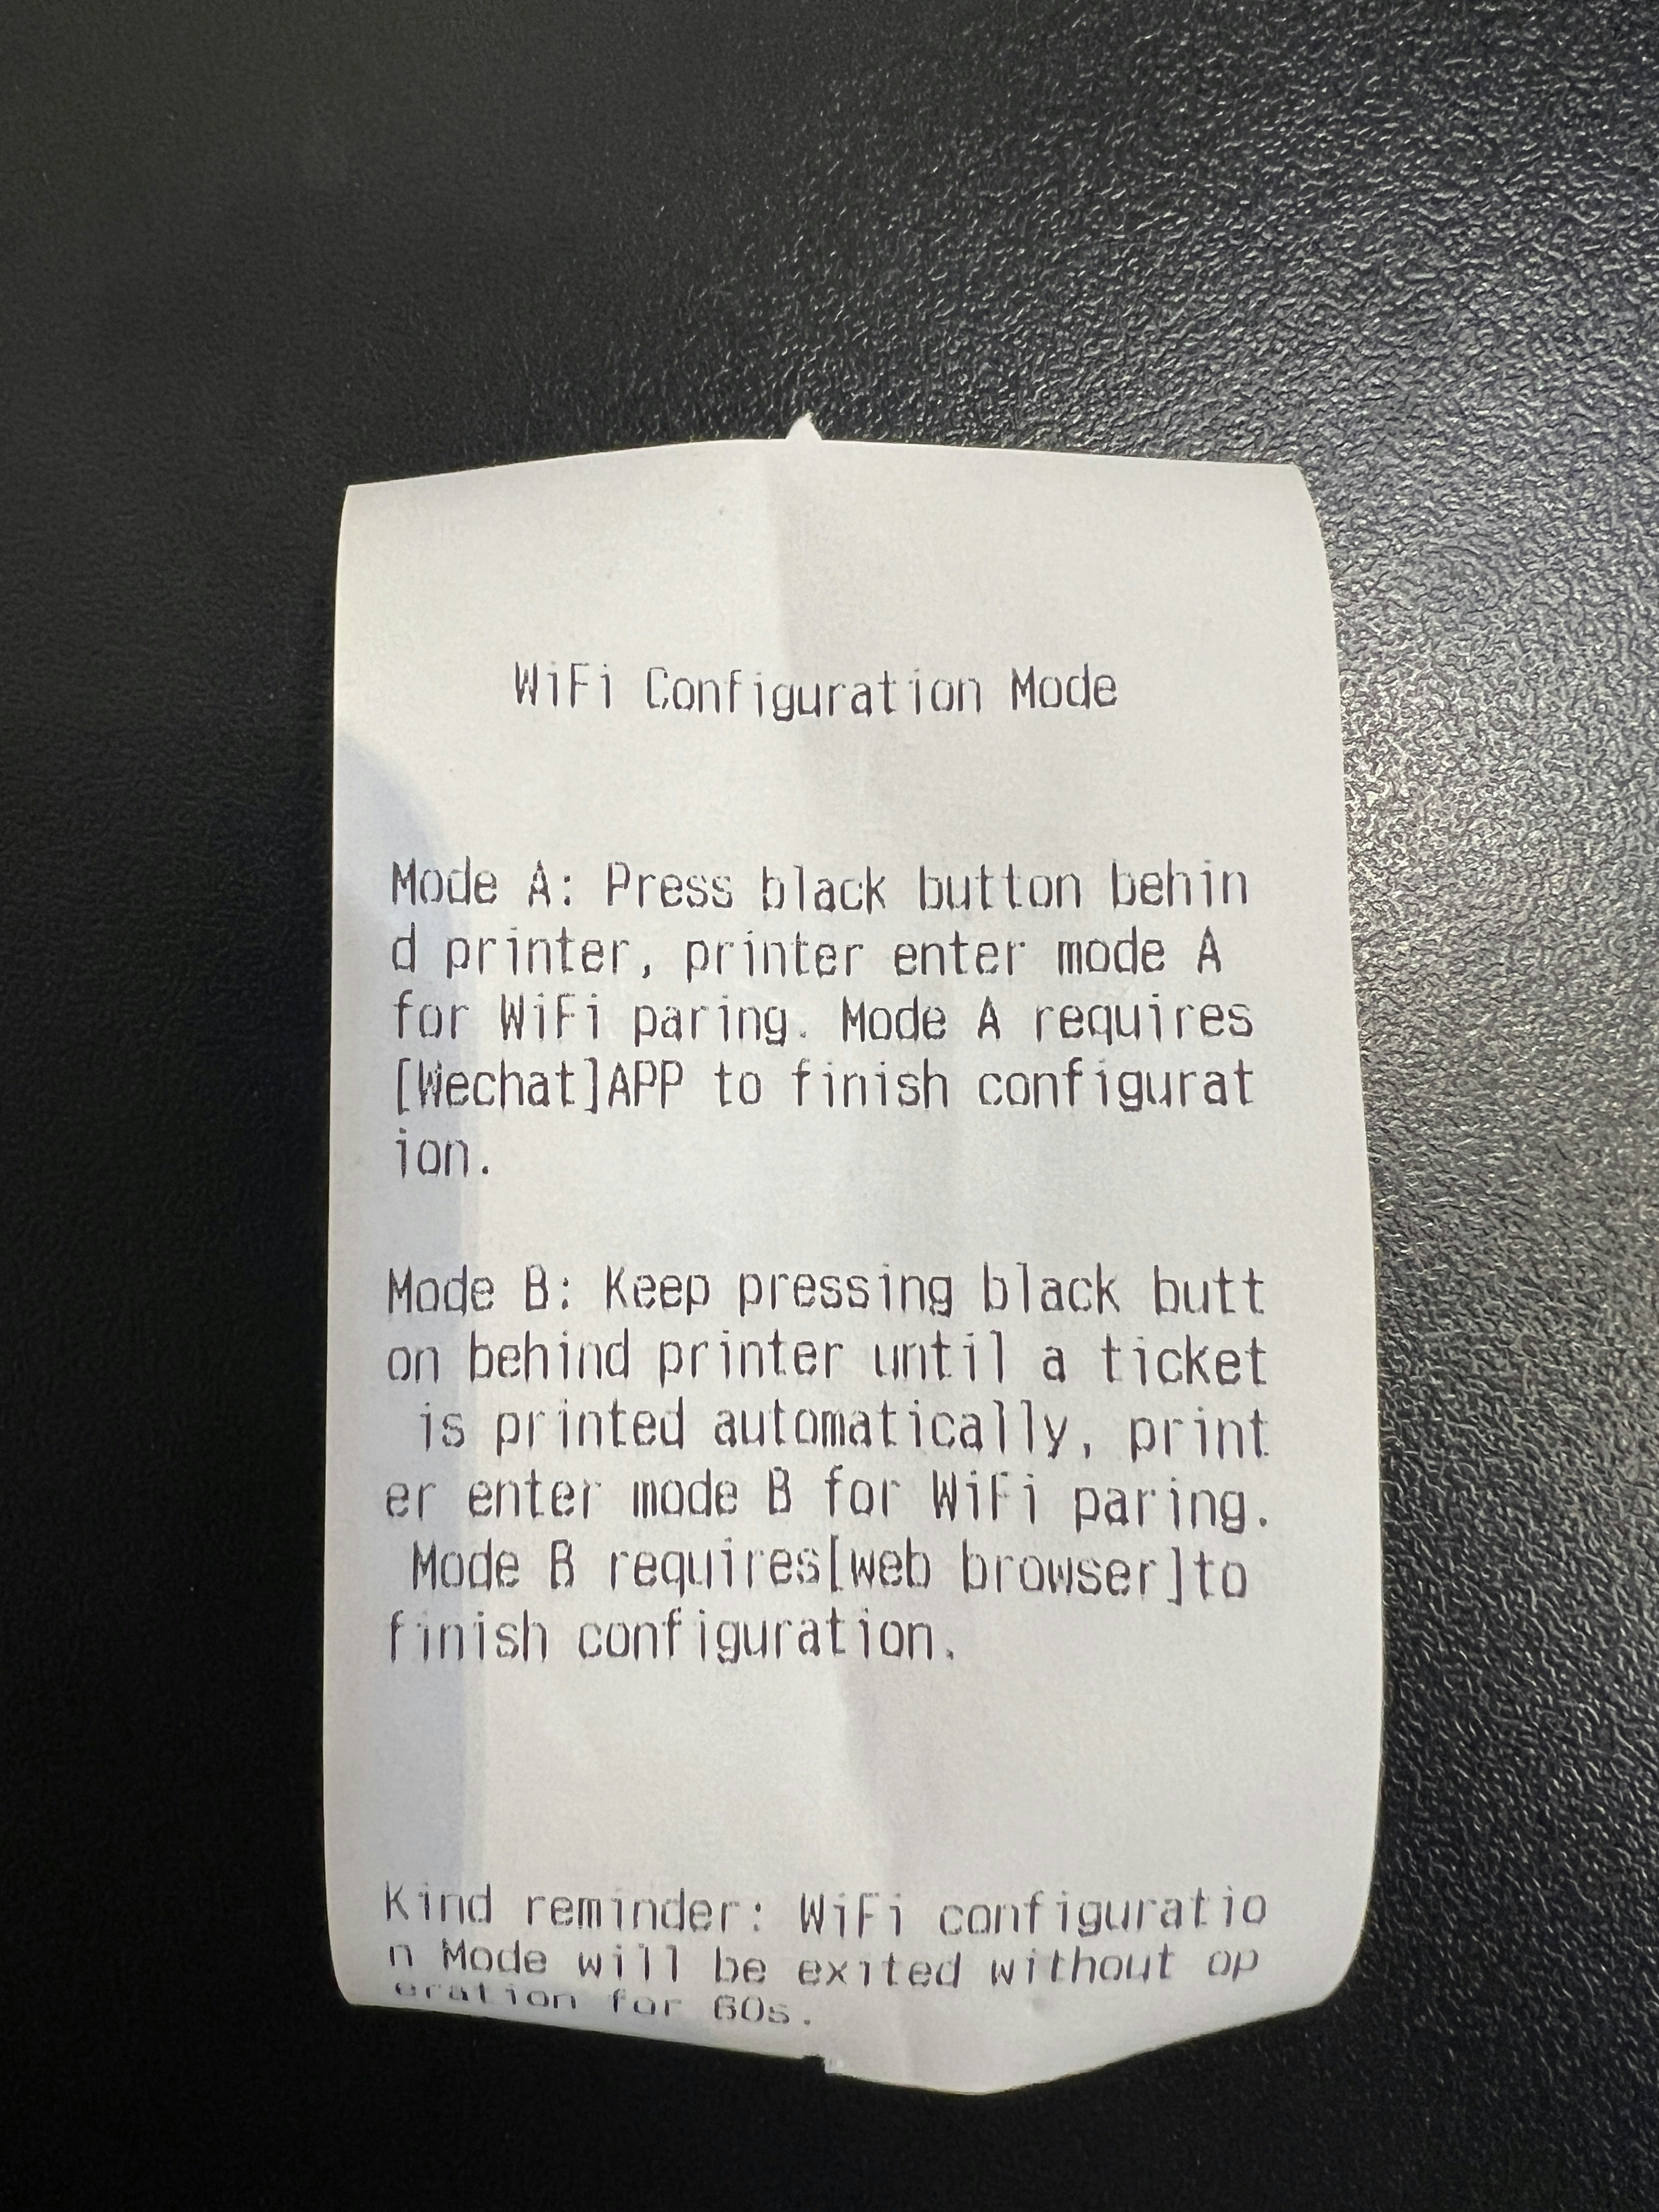
First receipt that will print
Press and hold the button again until another receipt prints. Do not release the button until it prints.
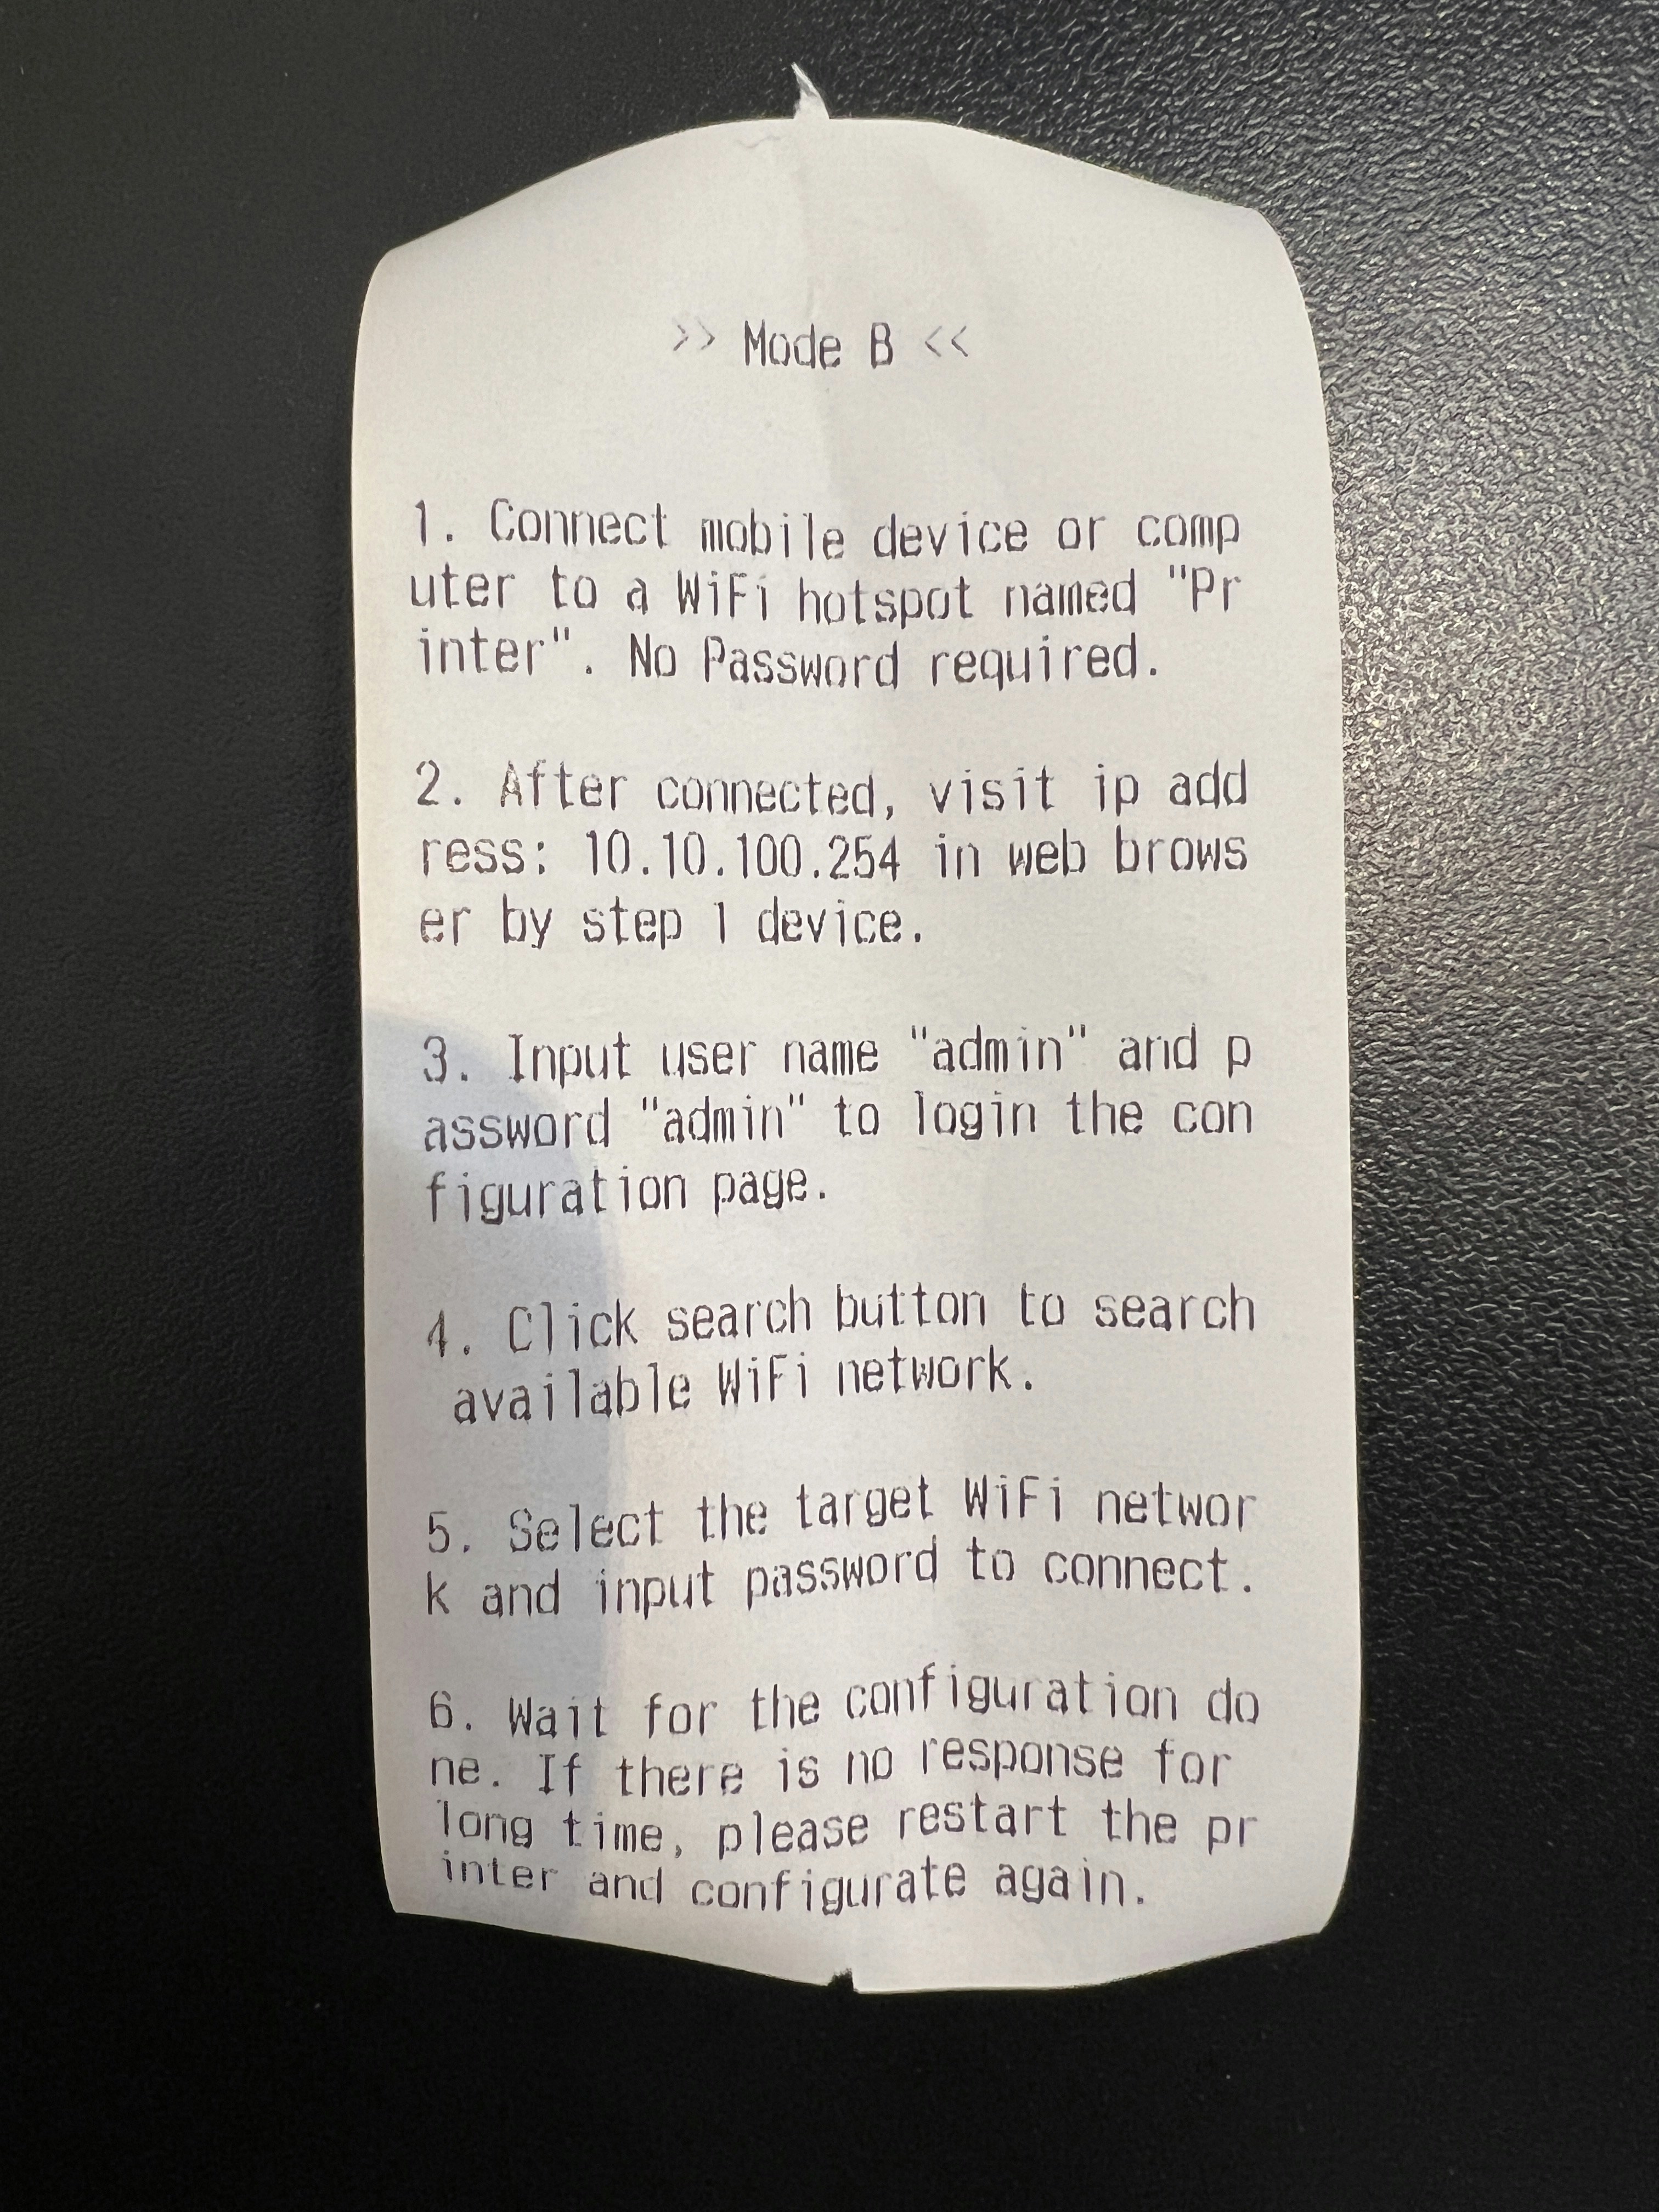
Second receipt that will print
Open your device's WiFi settings and connect to network named 'Printer'

Printer network will look like this in the WiFi available networks list
Open a browser and enter 10.10.100.254 in the search bar.
When prompted, enter admin for both the username and password.
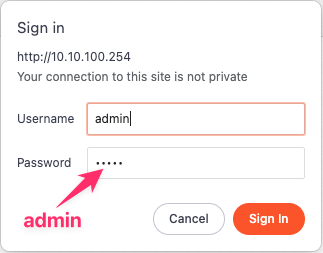
This is the prompt that will ask you to enter admin as a user and password
Once inside the printer's configuration menu, click SCAN to see the available WiFi networks
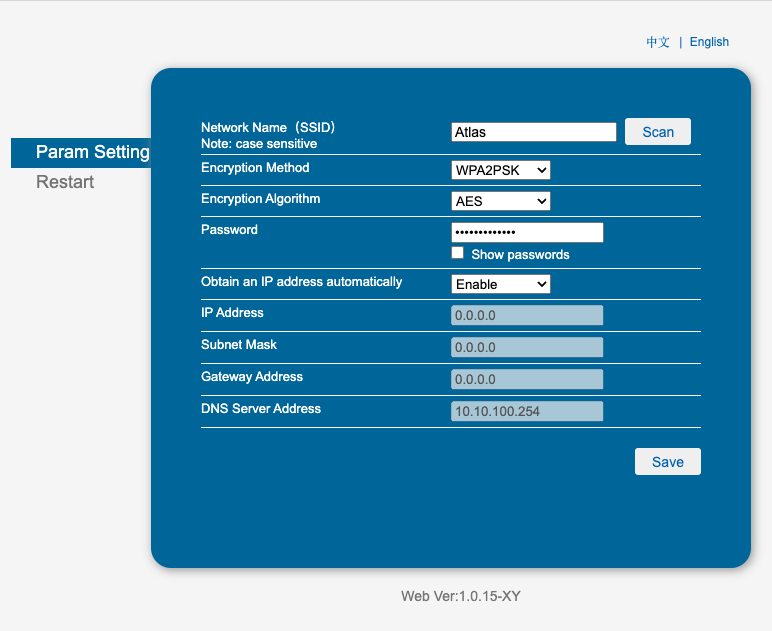
The SCAN button is located in the right corner too
Select your WiFi network, click the dial button beside it, and then press OK.
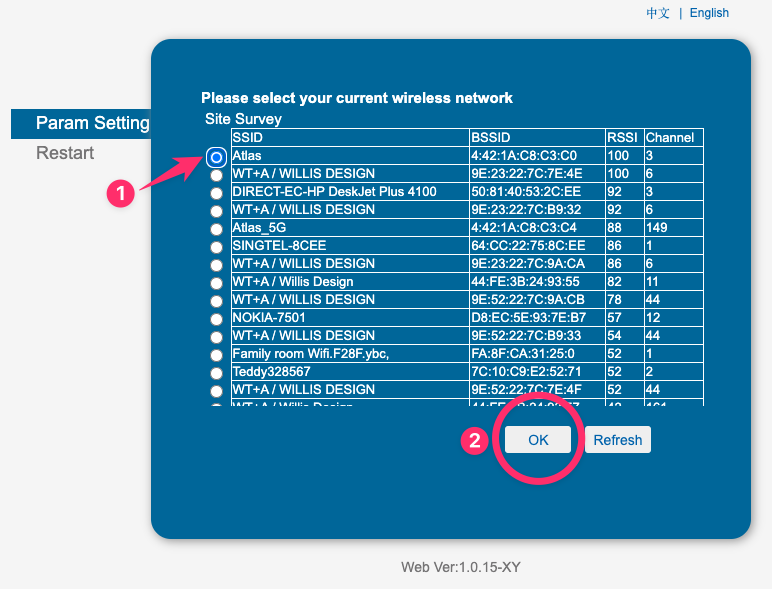
The list of available WiFi networks looks like this
Enter your WiFi password, click Show Password to confirm it's correct, and press Save.
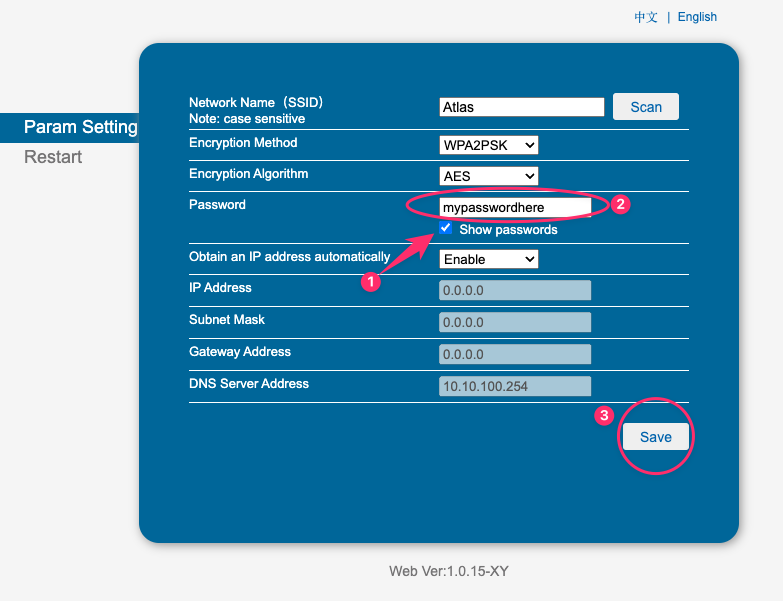
Enter your password and make sure it is correct.
Click Restart to finalise the connection.
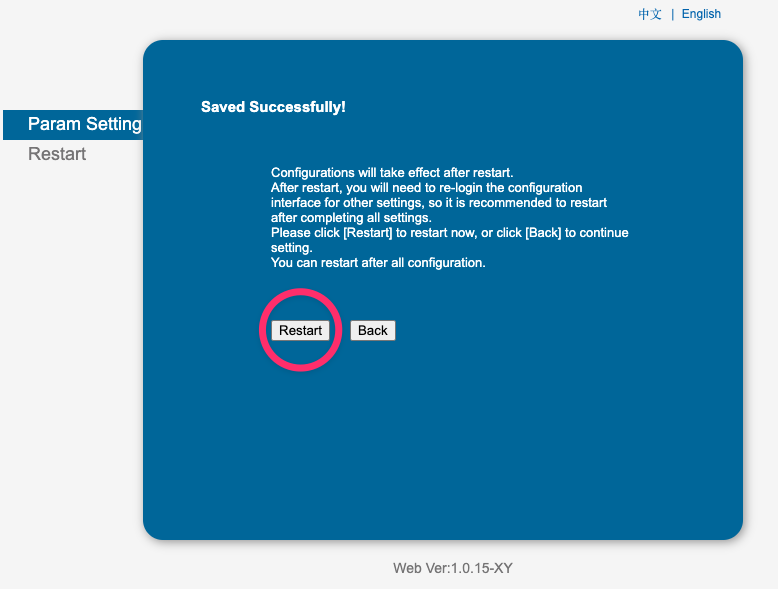
Press restart to finish this up.