- Atlas users with Manager or above permissions. Set permissions from Settings > Team members.
- Users managing menus for Atlas POS, Scan to Order, Kiosk, Online, or Aggregator platforms.
Before you begin
Menus in Atlas are designed to keep things organized and make ordering easy for both your team and your customers. Each menu consists of:- Sections. Folders that organise products into logical groups (e.g., “Burgers,” “Drinks”).
- Products. Individual items available for purchase (e.g., “Cheeseburger,” “Iced Latte”).
- Modifier Groups. Customisation options applied to products (e.g., “Choice of Sides,” “Extra Toppings”).
- Modifiers. The specific selections within a modifier group (e.g., “Fries,” “Extra Cheese”).
- Create and configure new menus.
- Add sections, products, modifier groups and modifiers.
Creating a new menu
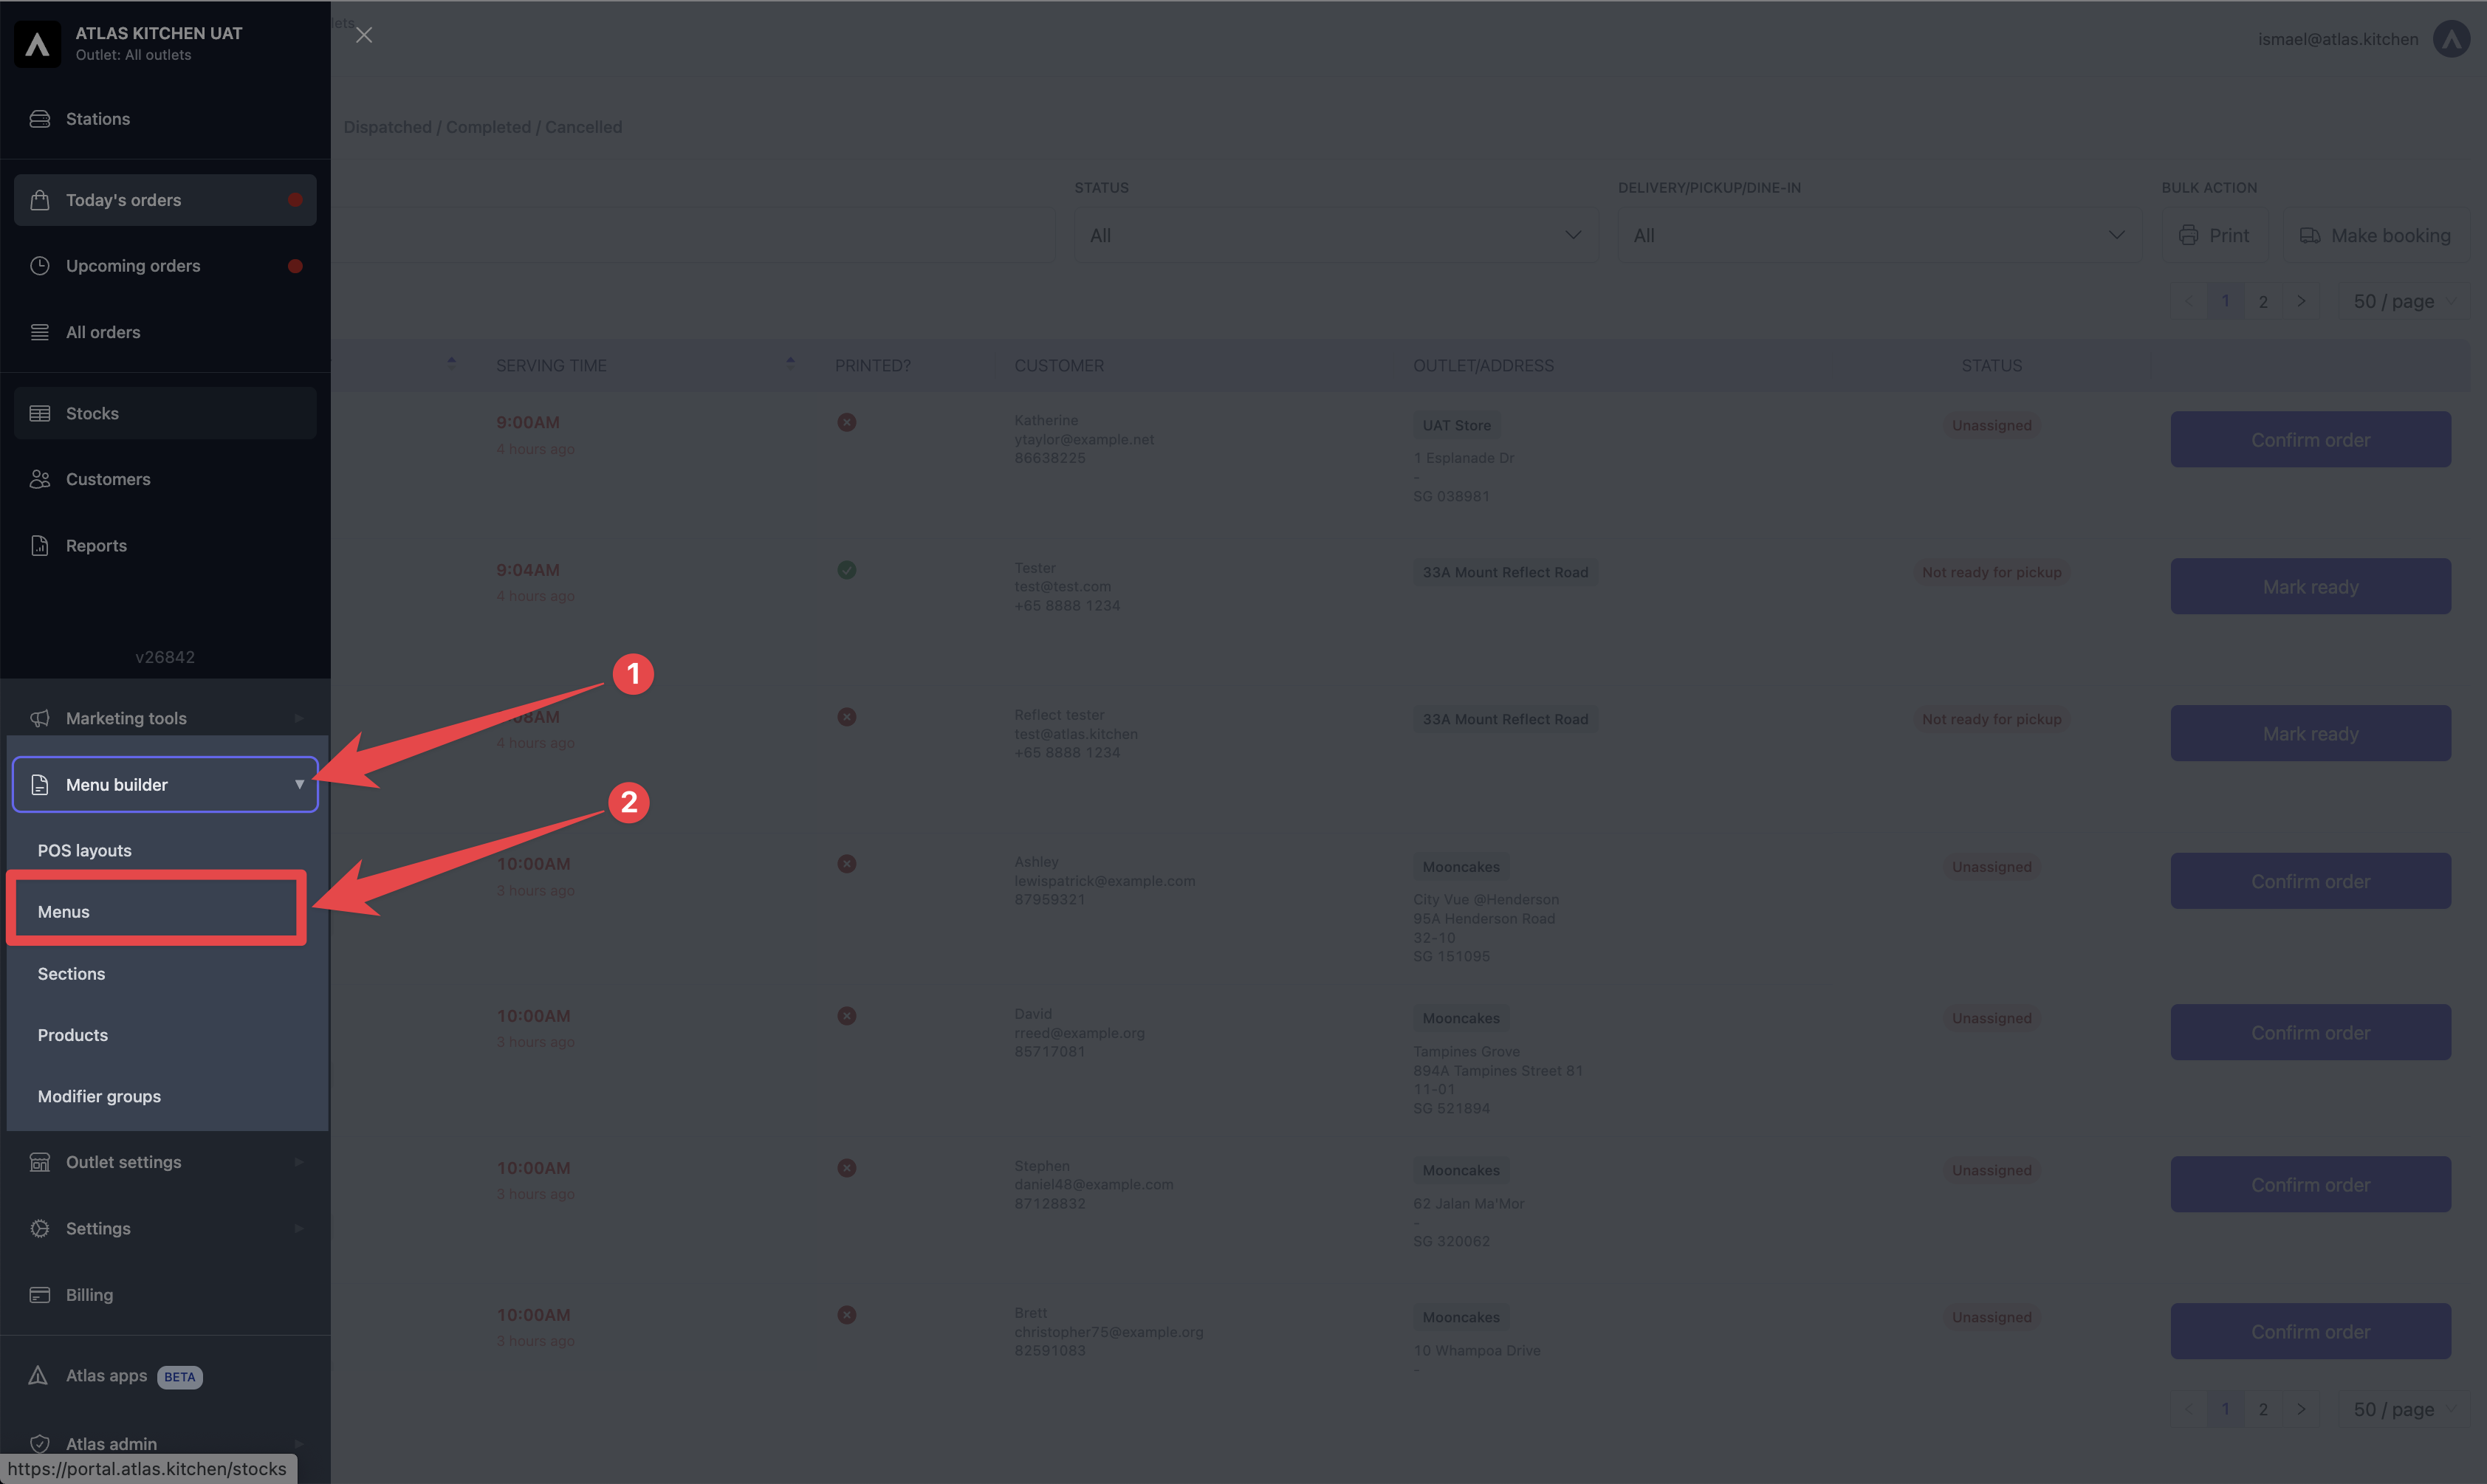
Follow these steps to create a new menu:Open the side bar menu, and tap on "Menu Builder" > "Menus".
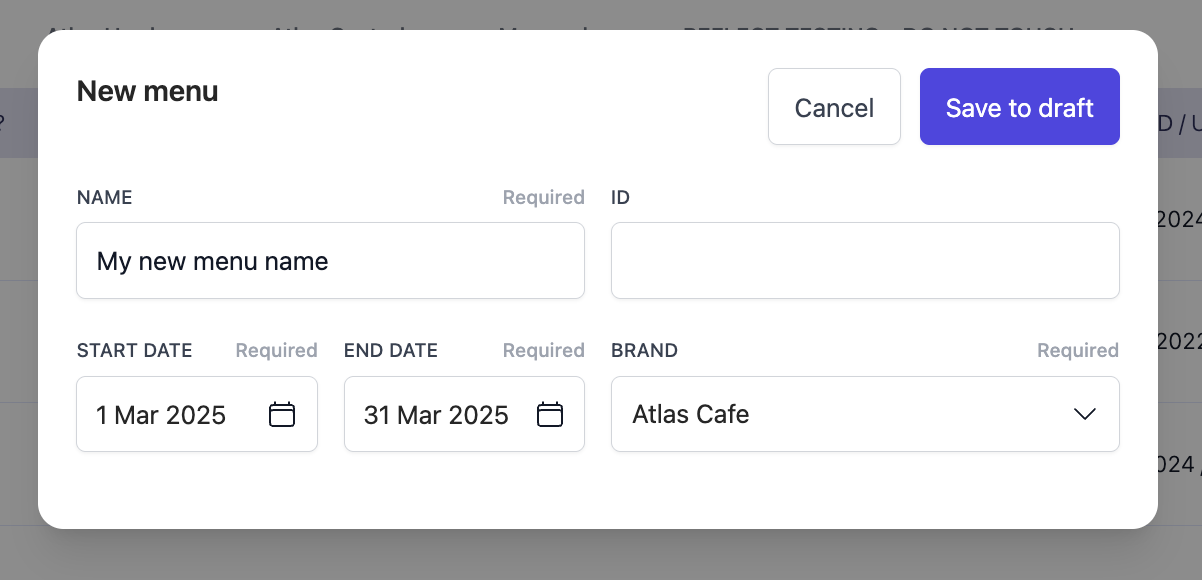
On the top-right corner, tap "Add Menu".

In the next modal, add the details of your new menu > Tap on "Save to draft".
Creating and adding sections to a menu
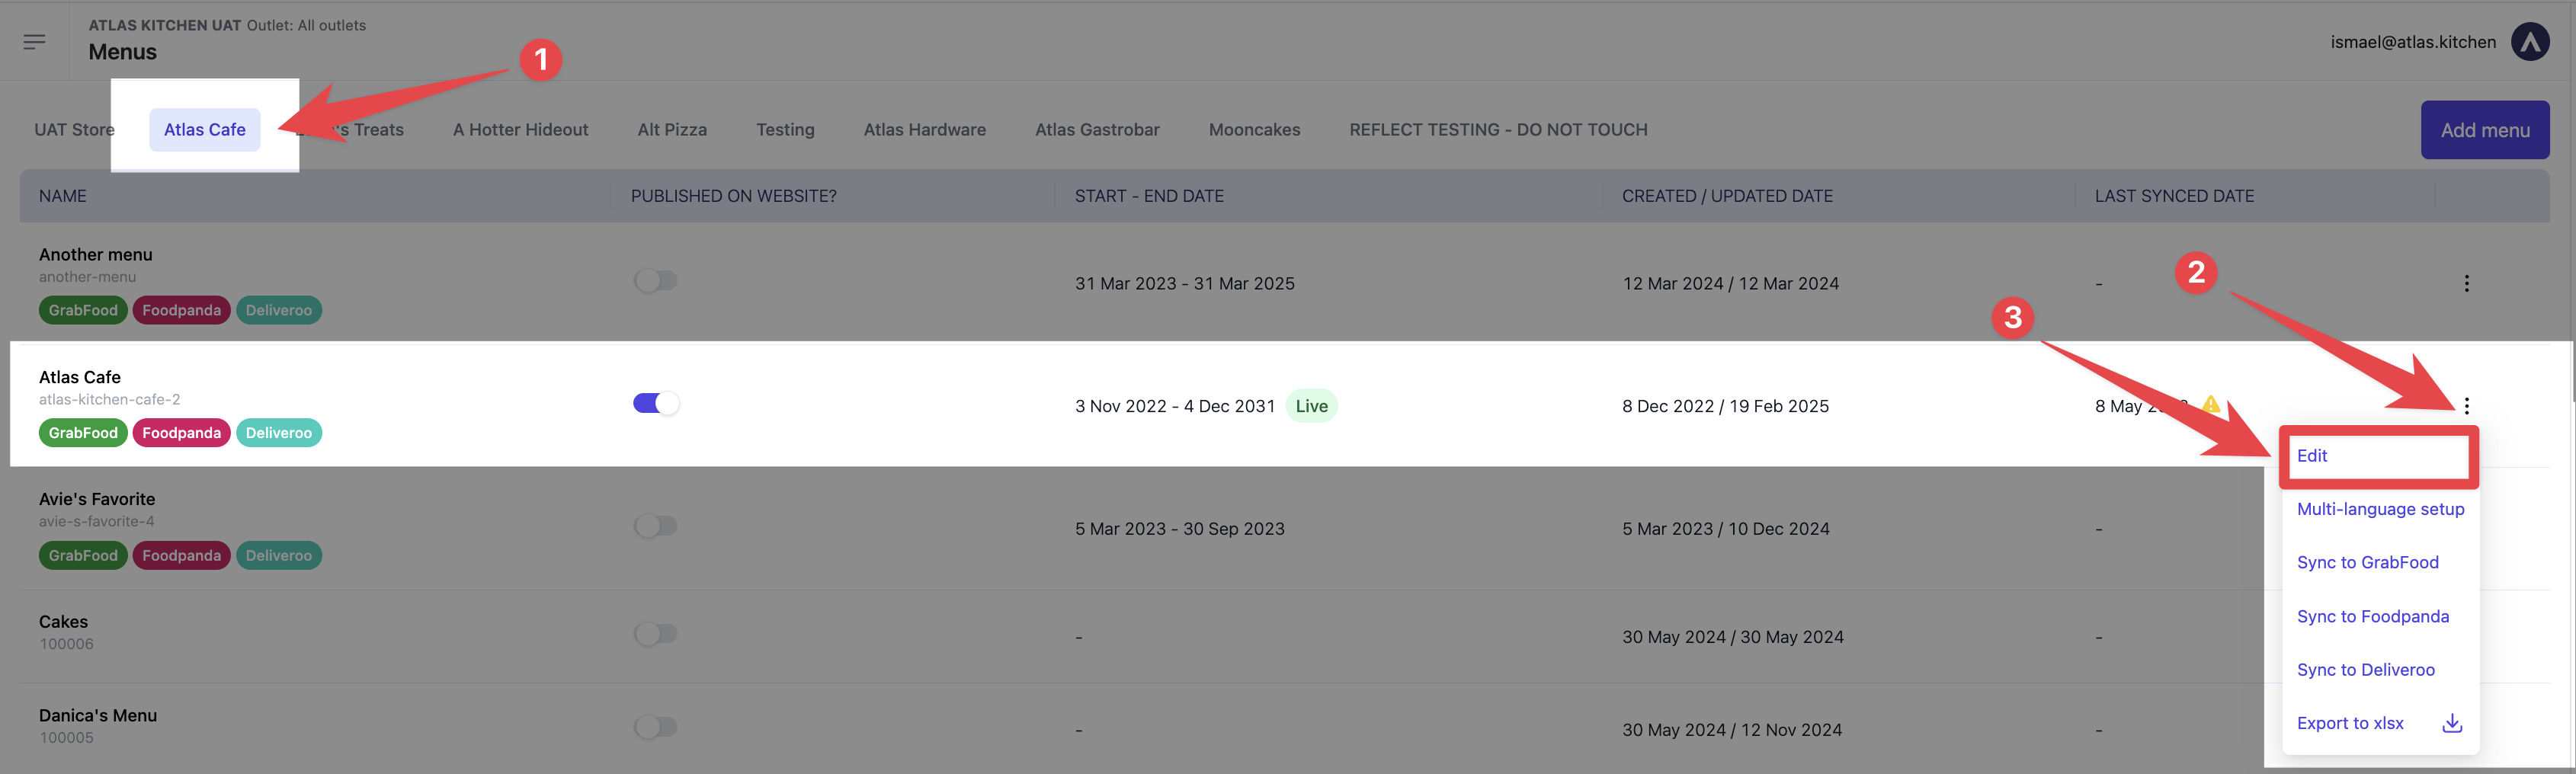
Folders that organise products into logical groups (e.g., “Burgers,” “Drinks”). Best practice is to keep it short to ~6 sections. If you have more than 5-6 sections, having a “Highlights” section is recommended at the top. Follow these steps to add a section:On the menus list: Navigate to the brand folder > Tap on the three dots next to the menu > Tap on "Edit".
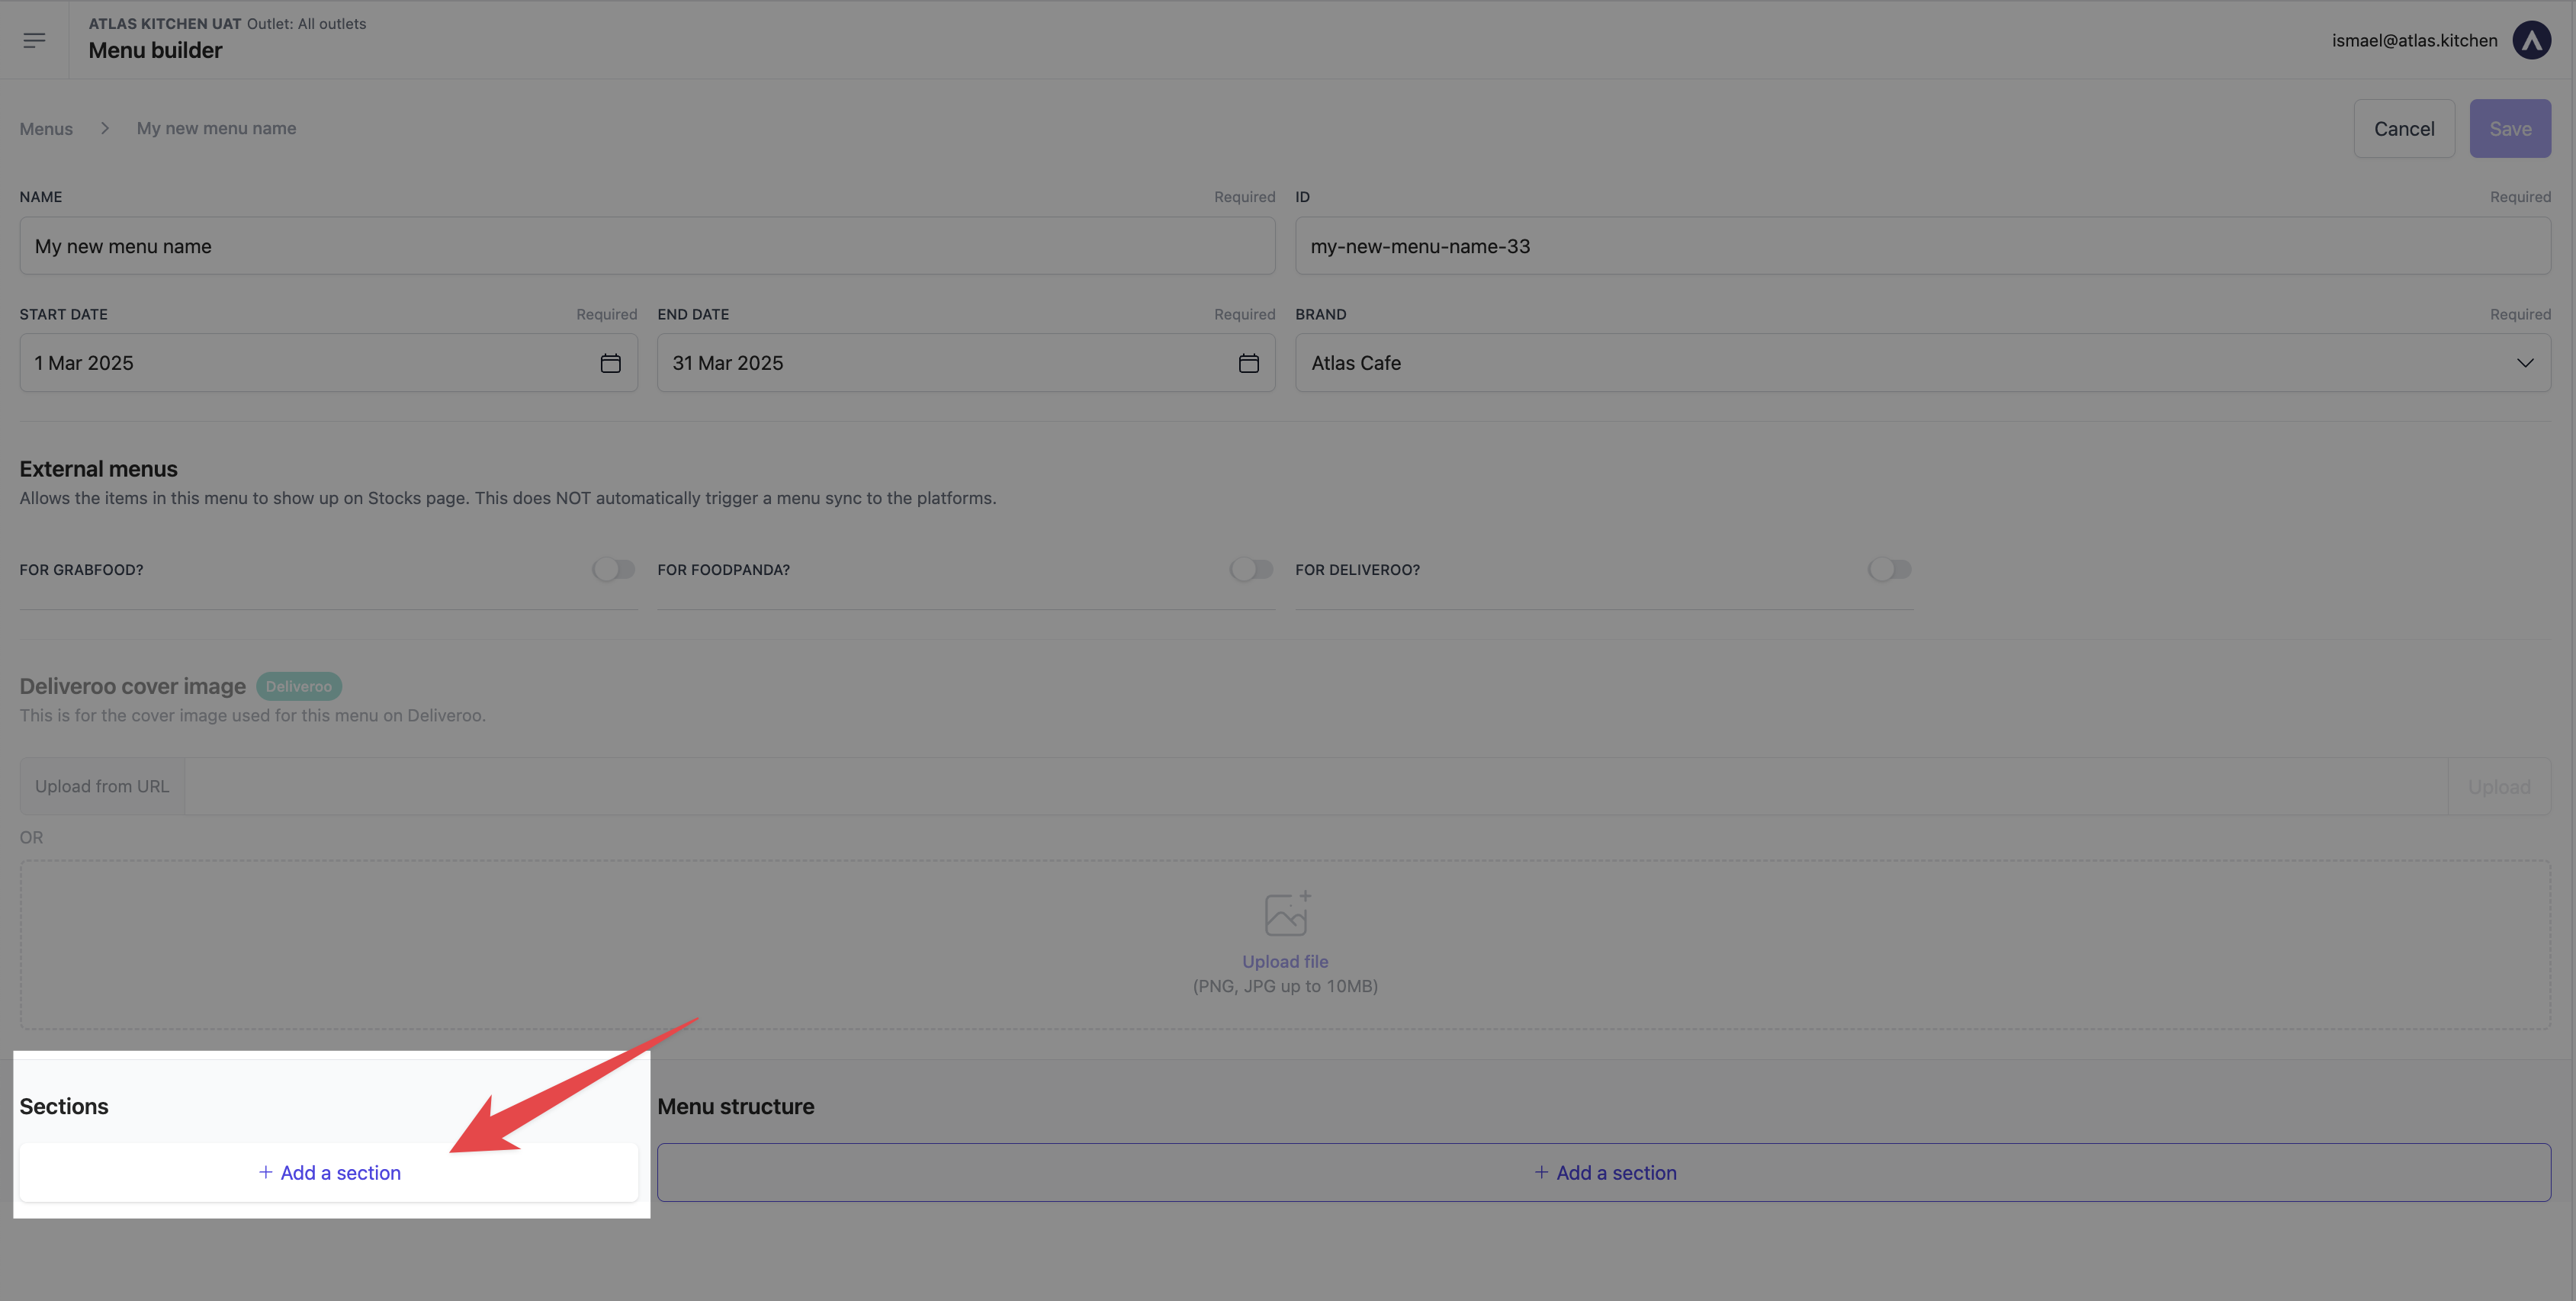
On the left of your screen, tap on "Add a section" to add new or existing sections.
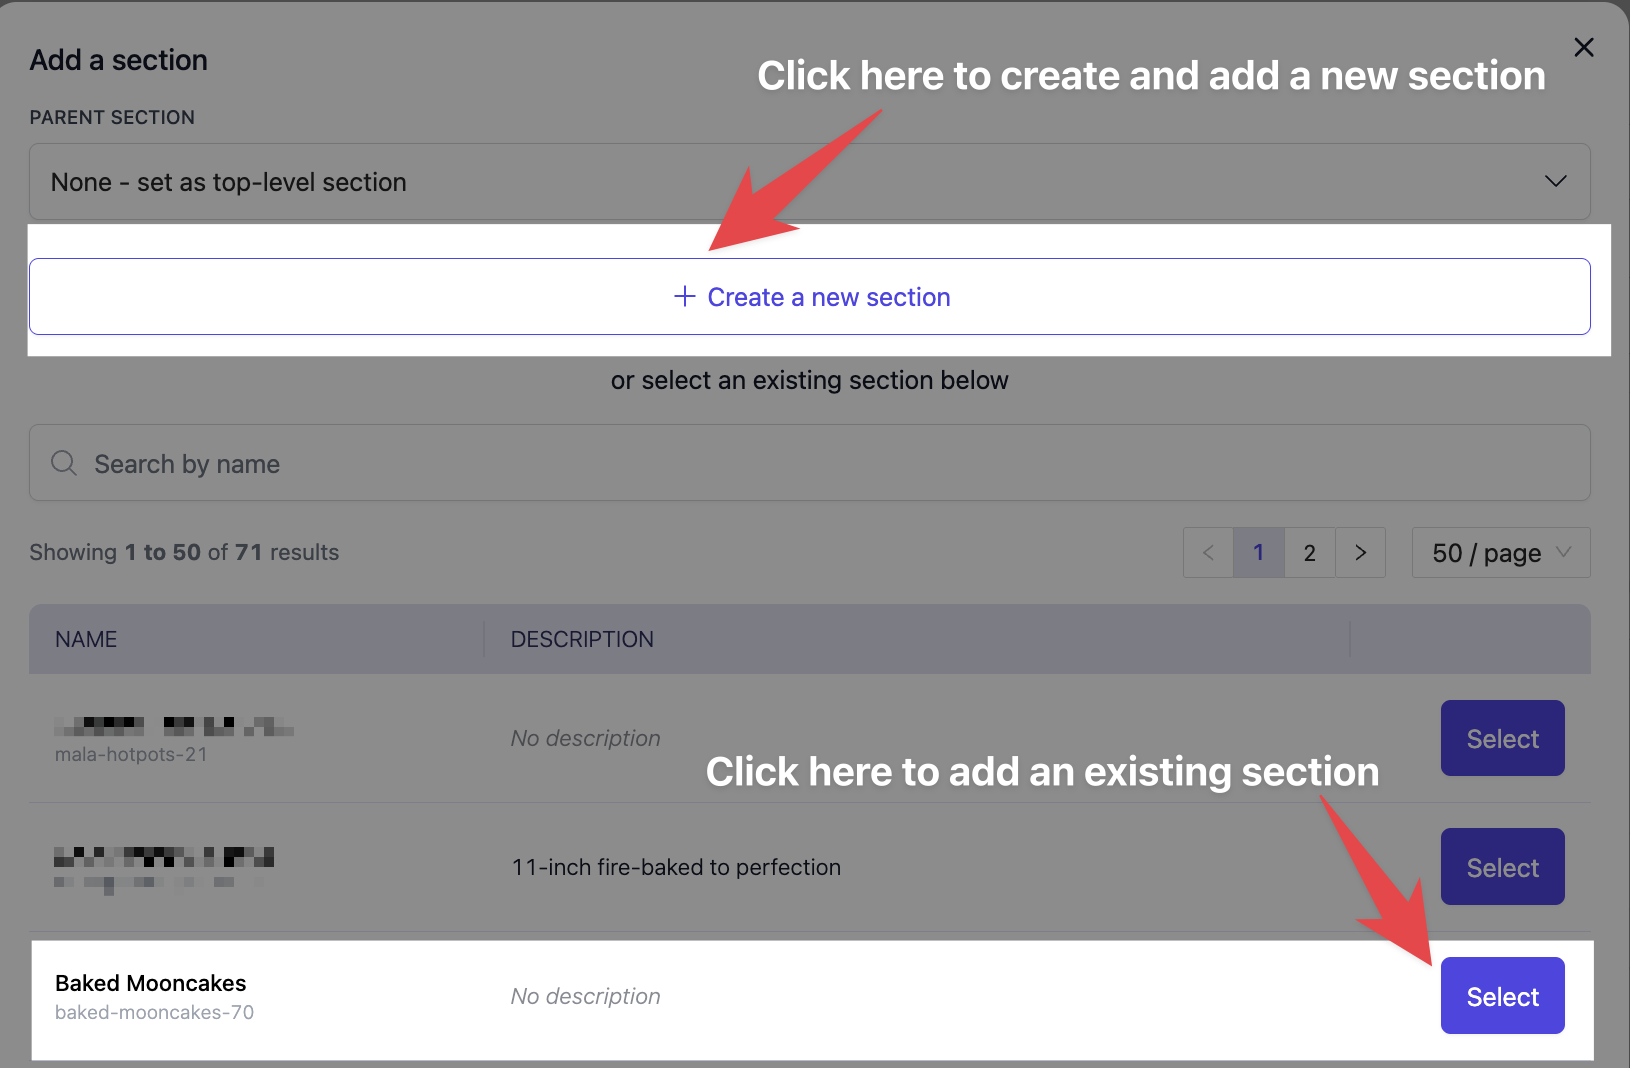
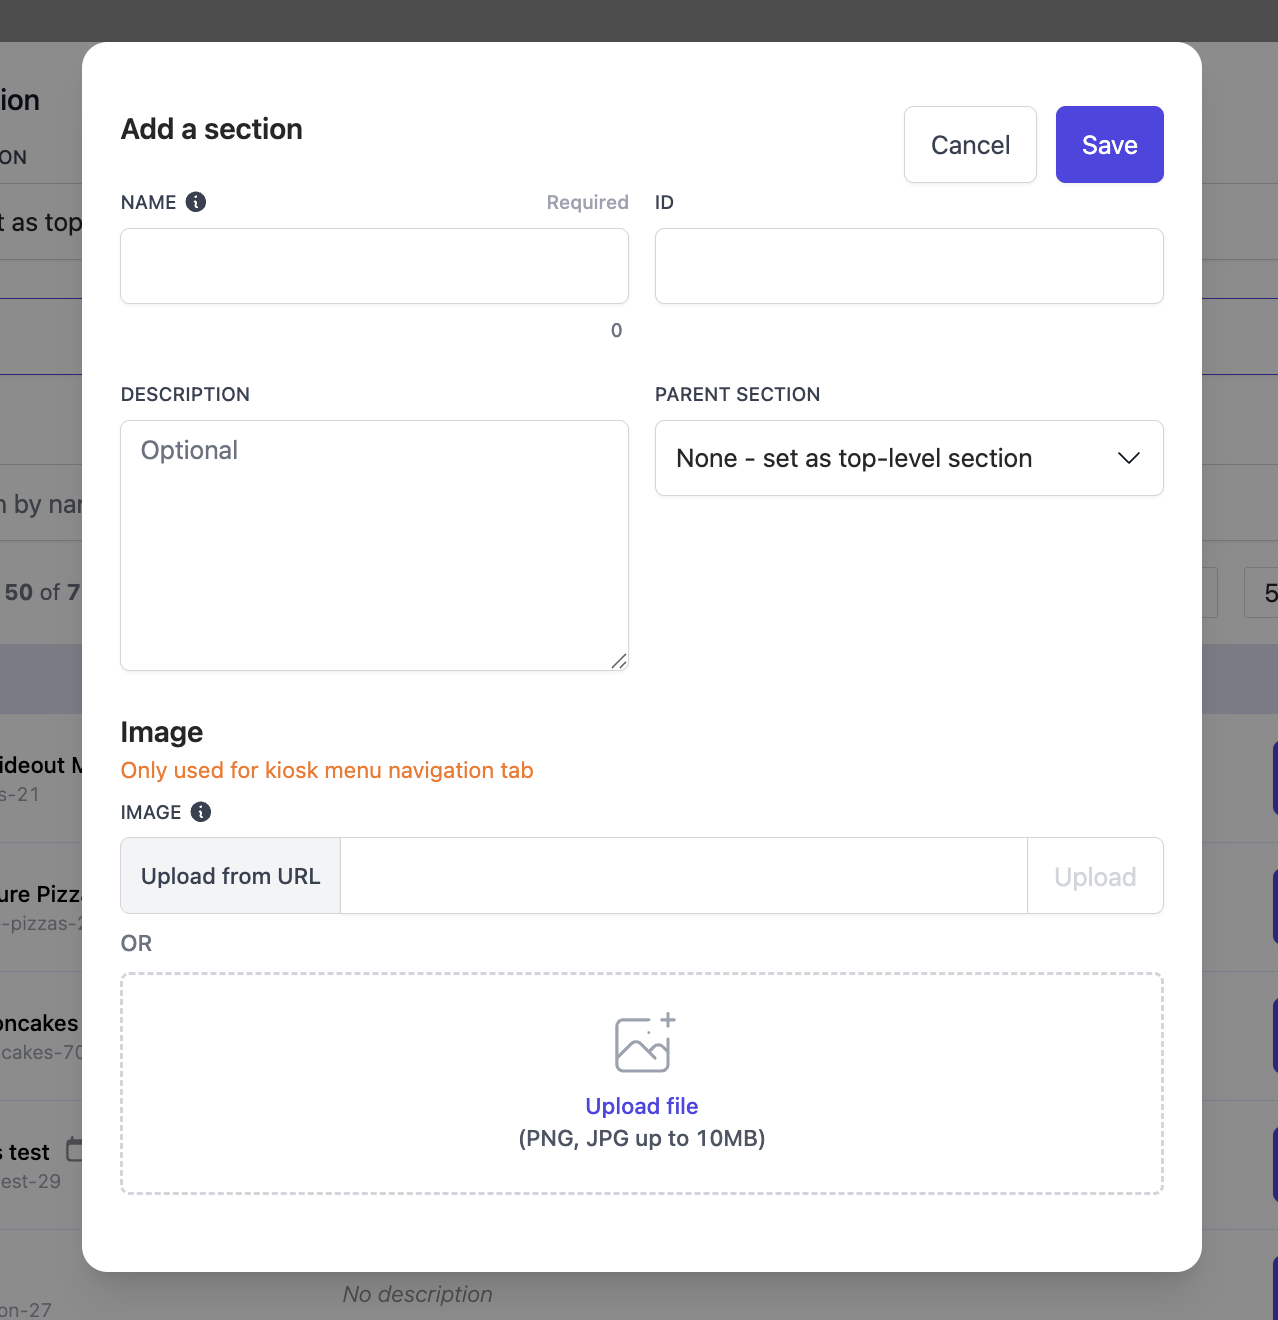
Add the details of your new section > Tap on "Save"
Adding products to a section
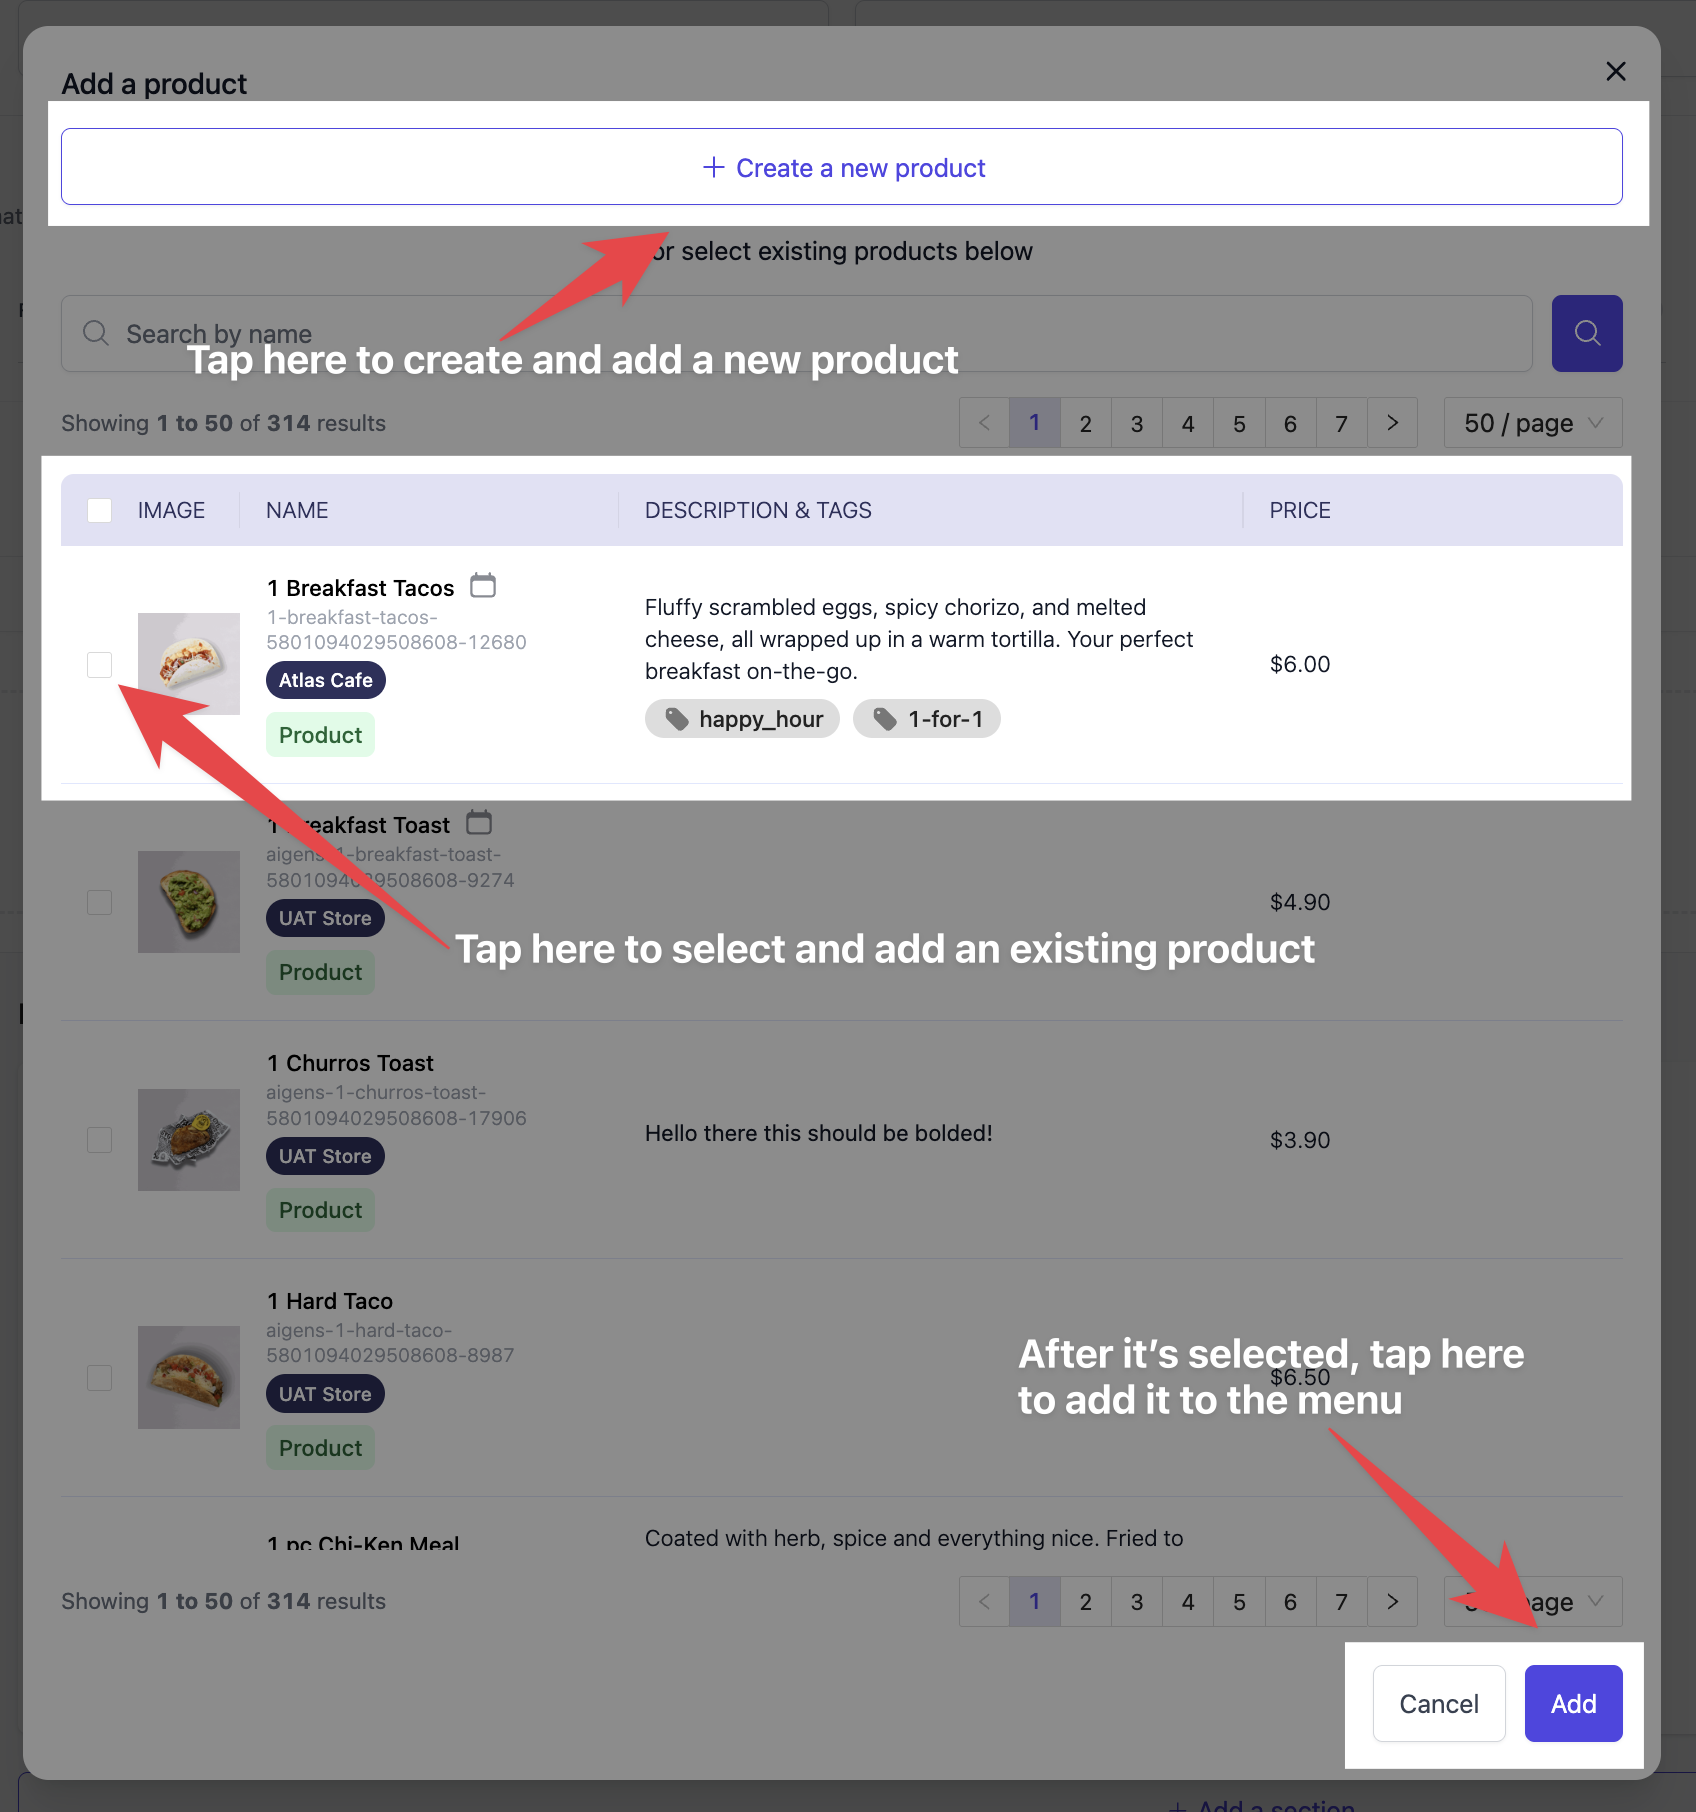
Individual items available for purchase (e.g., “Cheeseburger,” “Iced Latte”). These are housed inside Sections for better organization (e.g., “Burgers,” “Drinks”). To add an existing product to a section, follow these steps:Inside the menu: Scroll down to the new section > Tap on Add a product.

Tap on "Create new product" to add a new product, or select existing products and tap "Add".
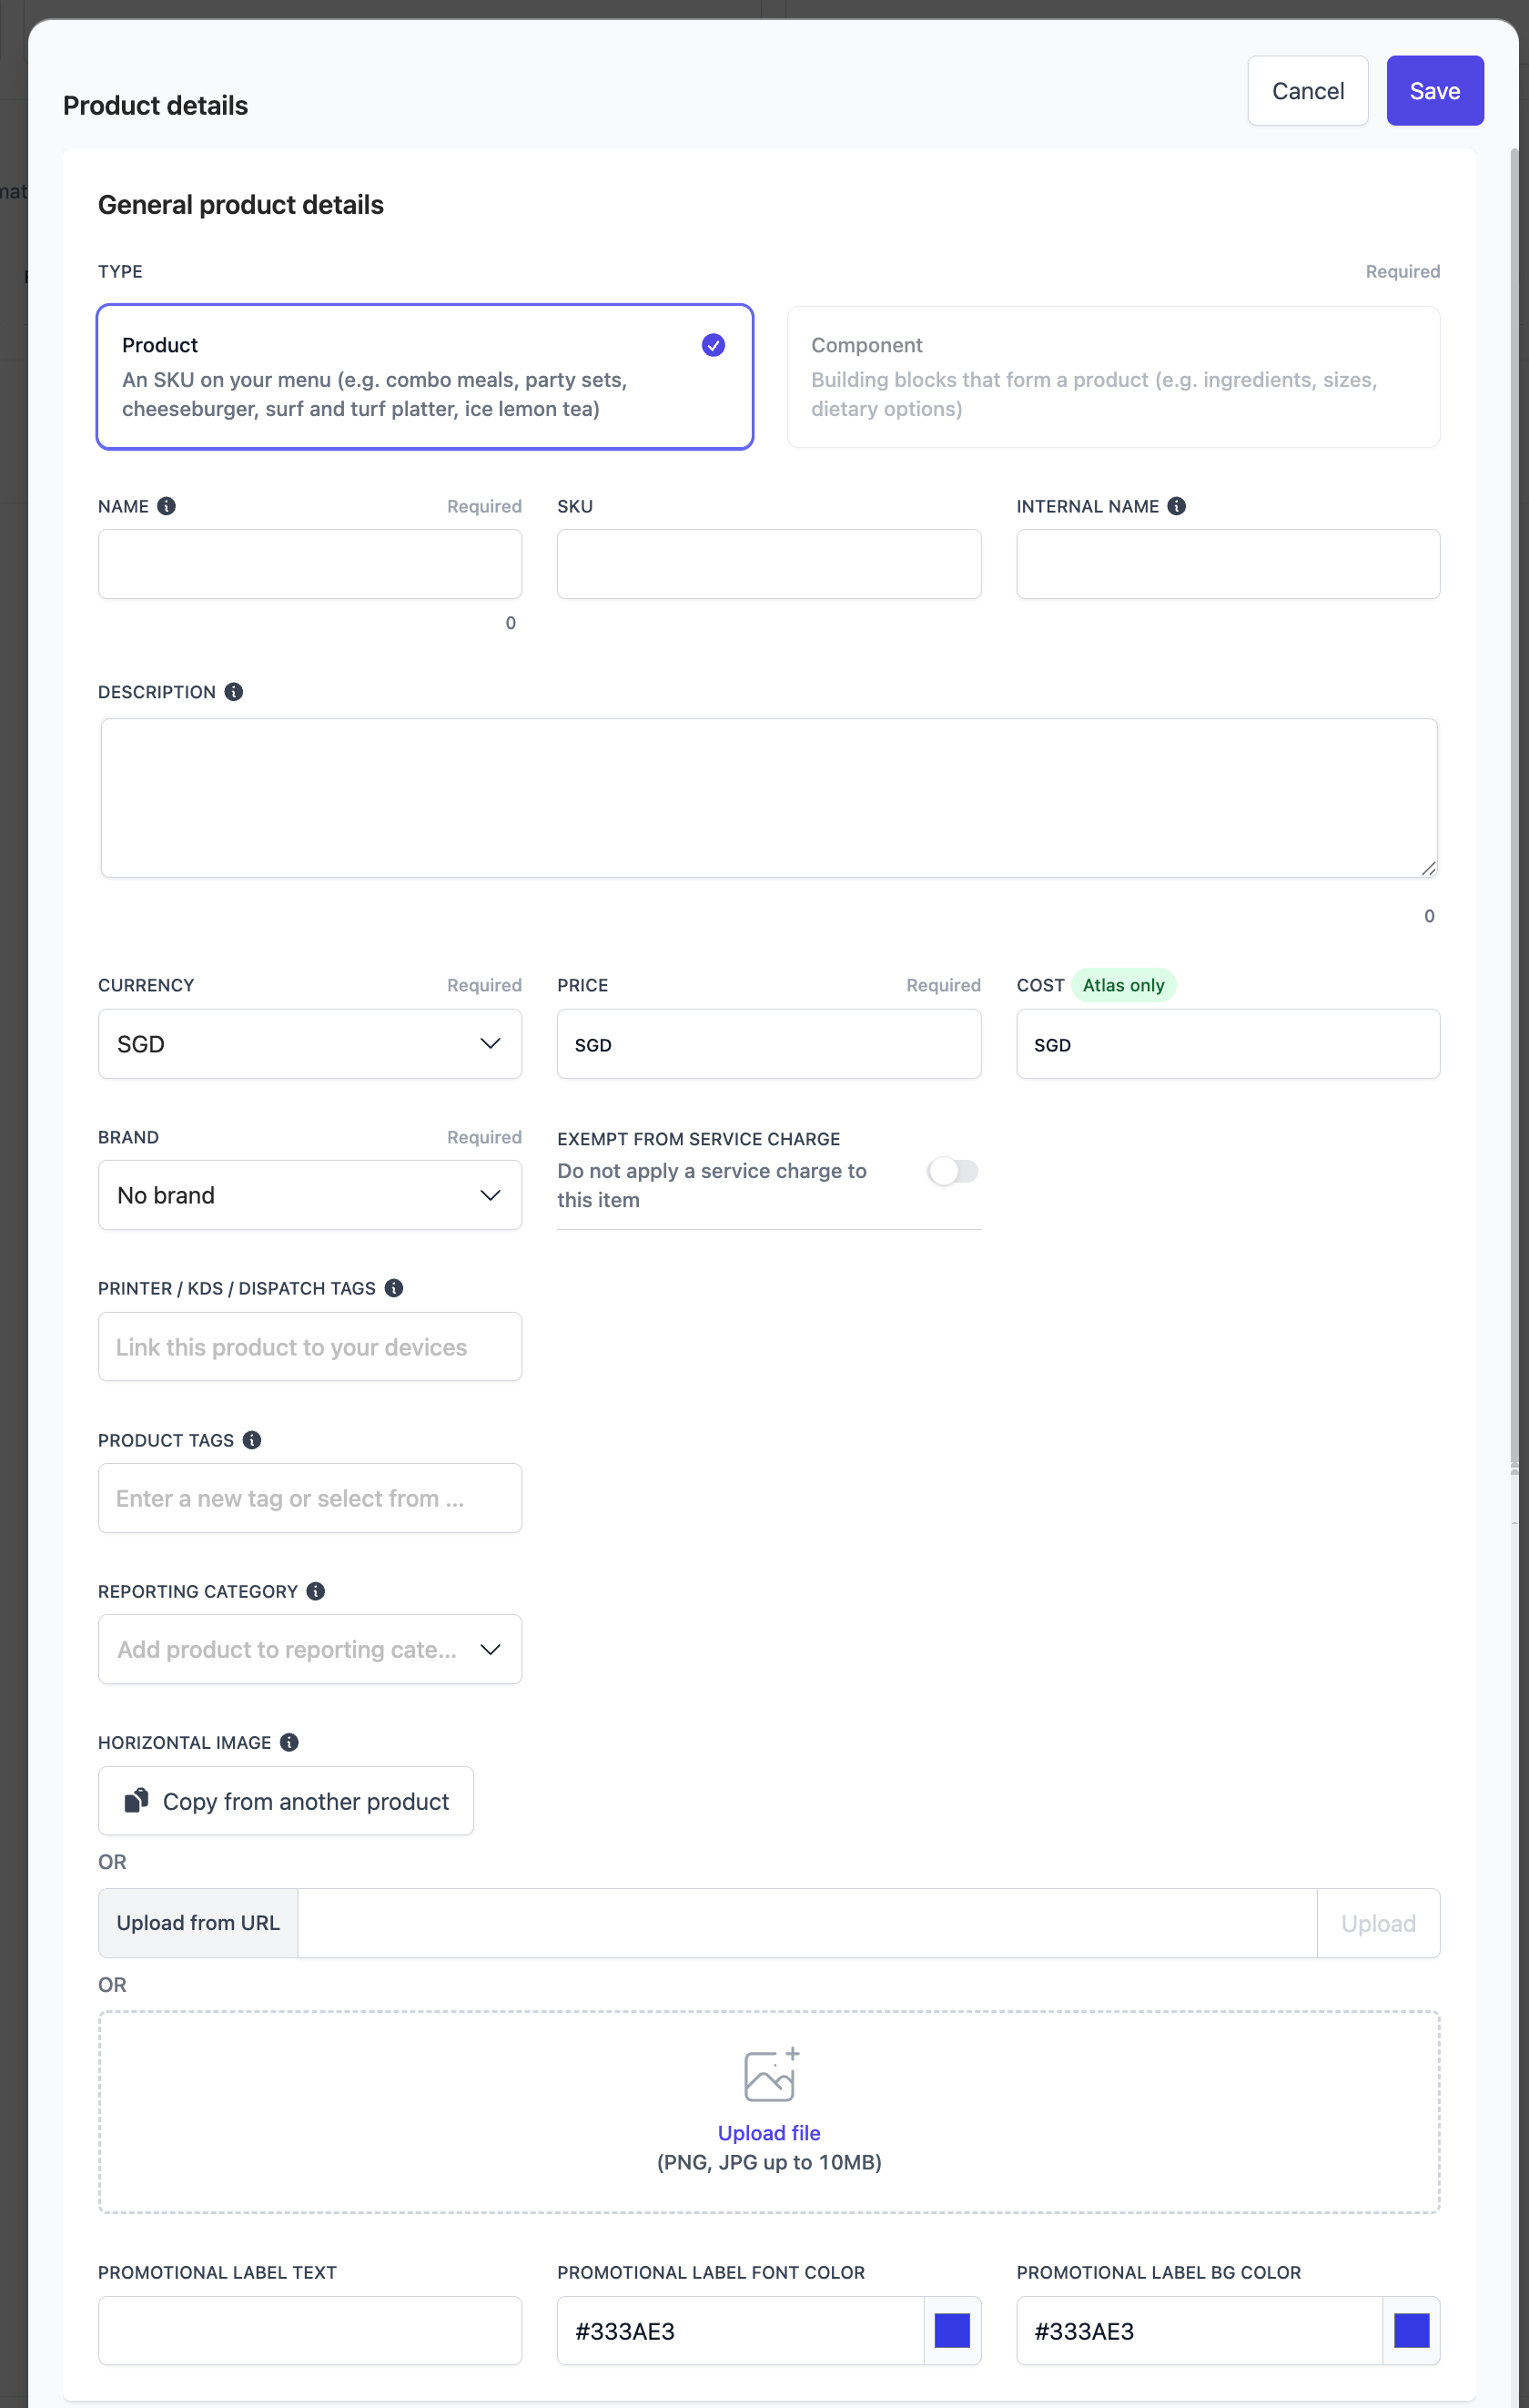
- SKU. This is an internal identifier that only you will see (and not diners). You can leave it blank, and one will be generated.
- Internal name. This is the label shown on your kitchen receipts, stickers and display screens. Diners will only see the product “Name”. If left blank, your staff will see “Name” instead.
- Exempt from service charge. Toggle this configuration on for retail-specific products that are exempted from service charges.
-
Printer / KDS / Dispatch tags. Use this field to tag products to be printed or displayed on the corresponding printers, KDS, or Dispatch screens.
- Tap on this field to see the available tags, or key in a new one and press enter to save it before saving the product.
- During onboarding, we will pre-set these up for you and guide you on how to use them.
- Product tags. Use this field to tag products for targeted discounts or segmenting. These tags can be selected and targeted when adding conditions to your discounts
-
Reporting category. Reporting categories will be reflected in your reports. Only one is allowed per product.
- Tap on this field to see the available categories, or key in a new one and press enter to save it before saving the product.
-
Horizontal image. This will be the image shown for your products.
- We recommend using square images with a minimum size of 800 x 800 pixels, keeping the subject centered, and ensuring the file size does not exceed 1-2 MB.
- Note that the edges of the images may be cropped automatically depending on where they are used across Atlas and the different platforms we integrate with. To avoid unintended cropping, leave some margin-safe space around the subject.
- You can upload it using 3 different methods:
- Copy from another product
- Upload from URL
- Upload file from your device
-
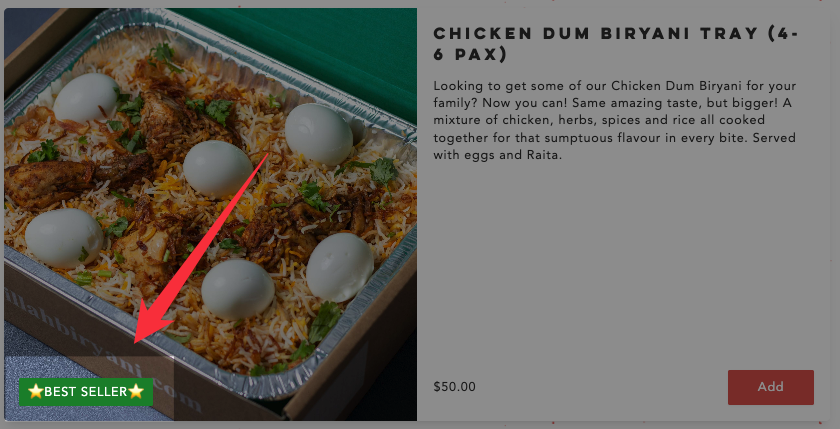
Promotional labels. These labels will be displayed on your products to promote them / add relevant information.
- You can select a colour that fits and stands out too
-
This is how they’ll look like:
Adding modifier groups to a product
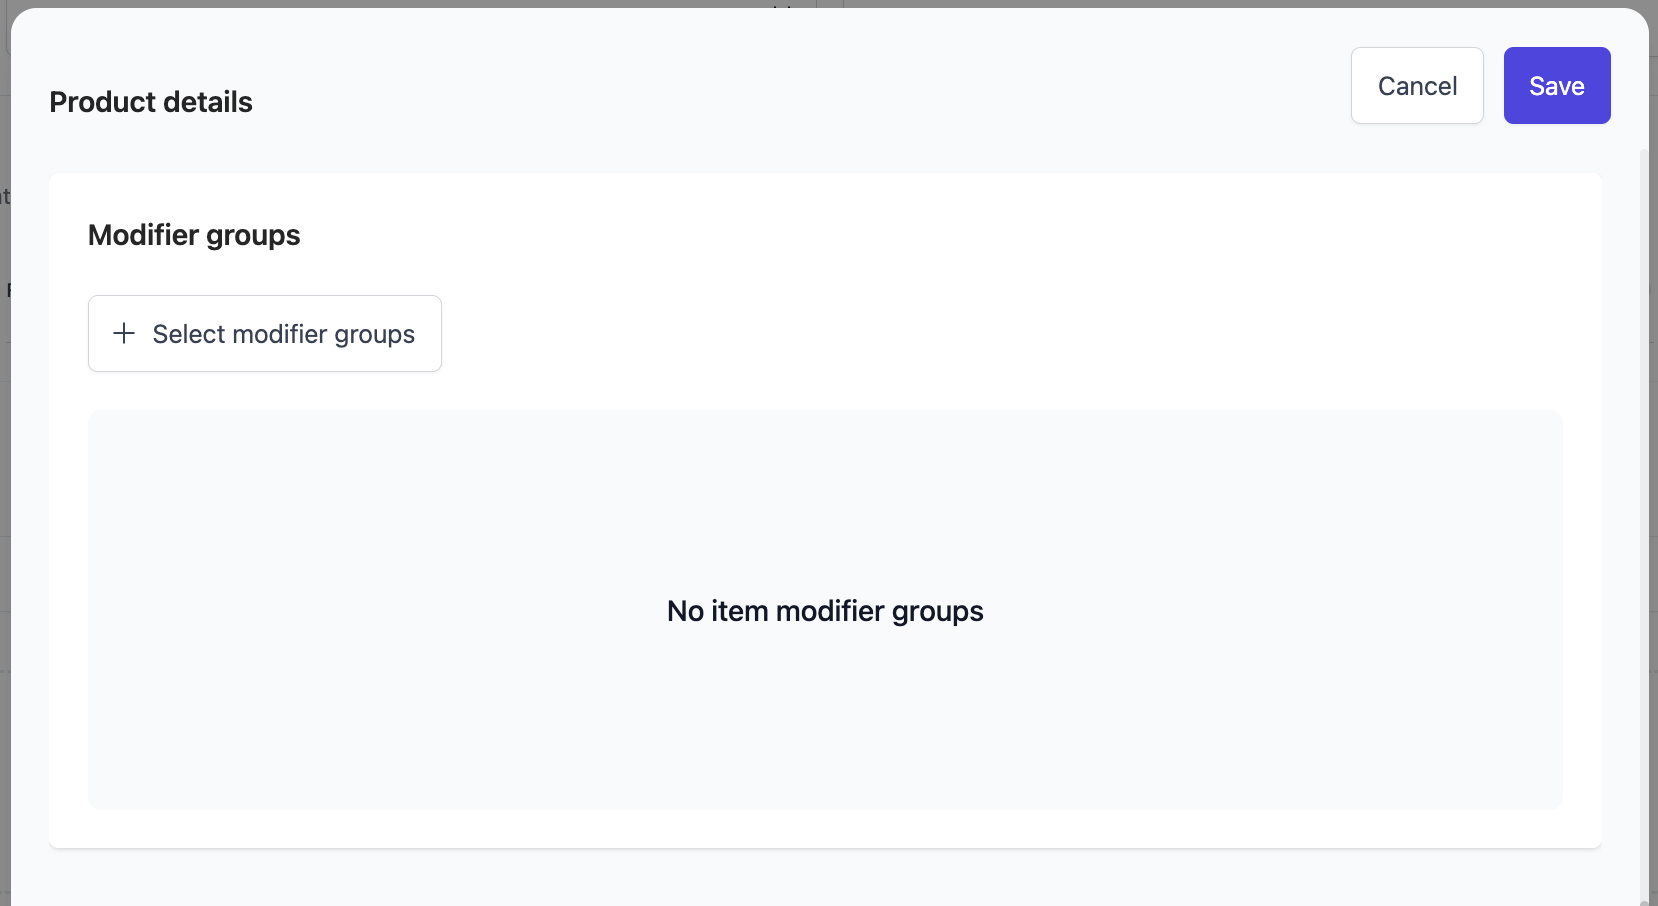
Modifier groups are customisation options applied to products (e.g., “Choice of Sides,” “Extra Toppings”). These will contain Modifiers, which are individual customisations or add-ons that can be selected within a product. For example, a “Choice of Sides” modifier group might contain options (called modifiers) like Fries, Salad, or Coleslaw. To add a modifier group to a product, follow these steps:Inside a product: Scroll down to Modifier groups > Tap on Select modifier groups.
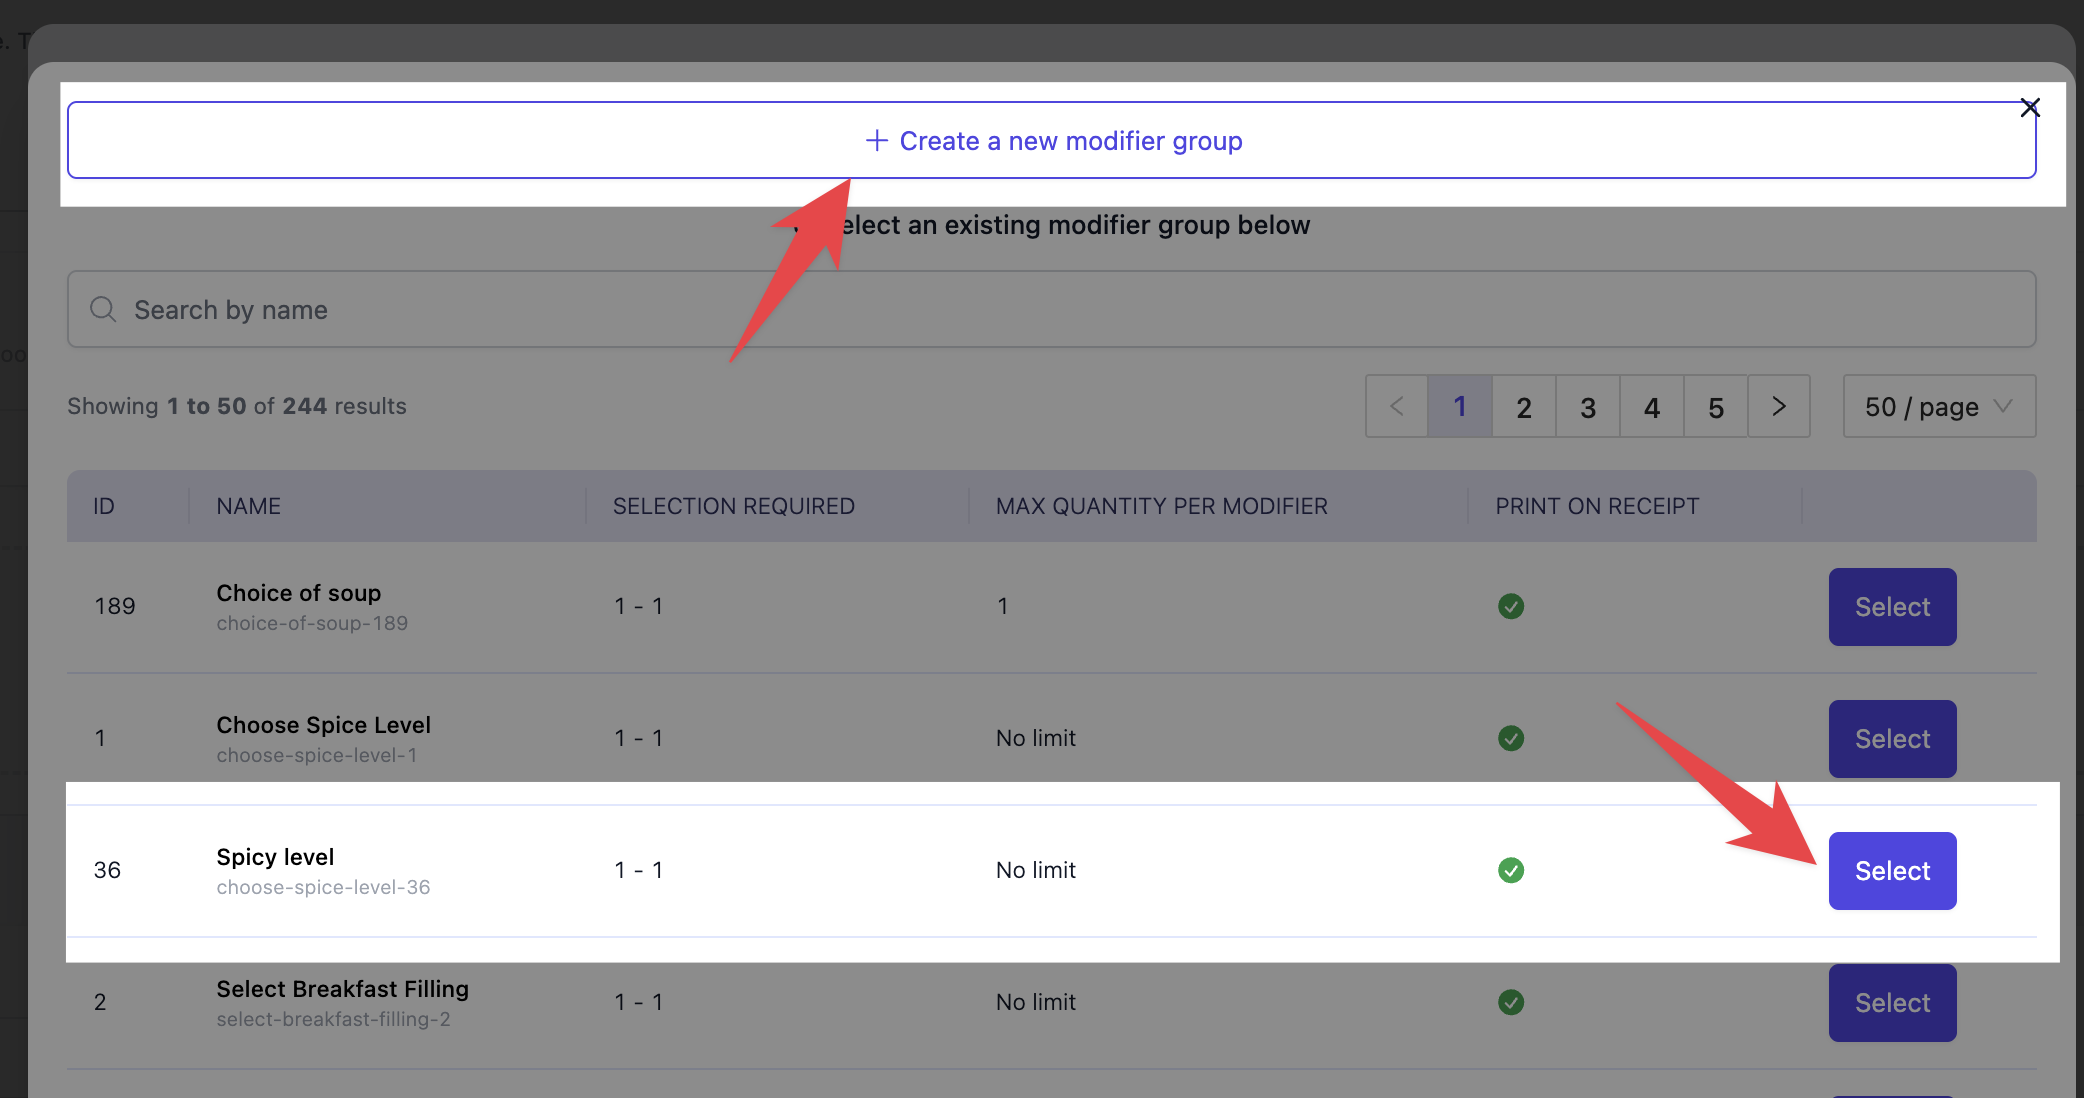
Tap on "Create a new modifier group" to create and add a new modifier group, or tap on "Select" to add an existing one.
Creating new modifier groups
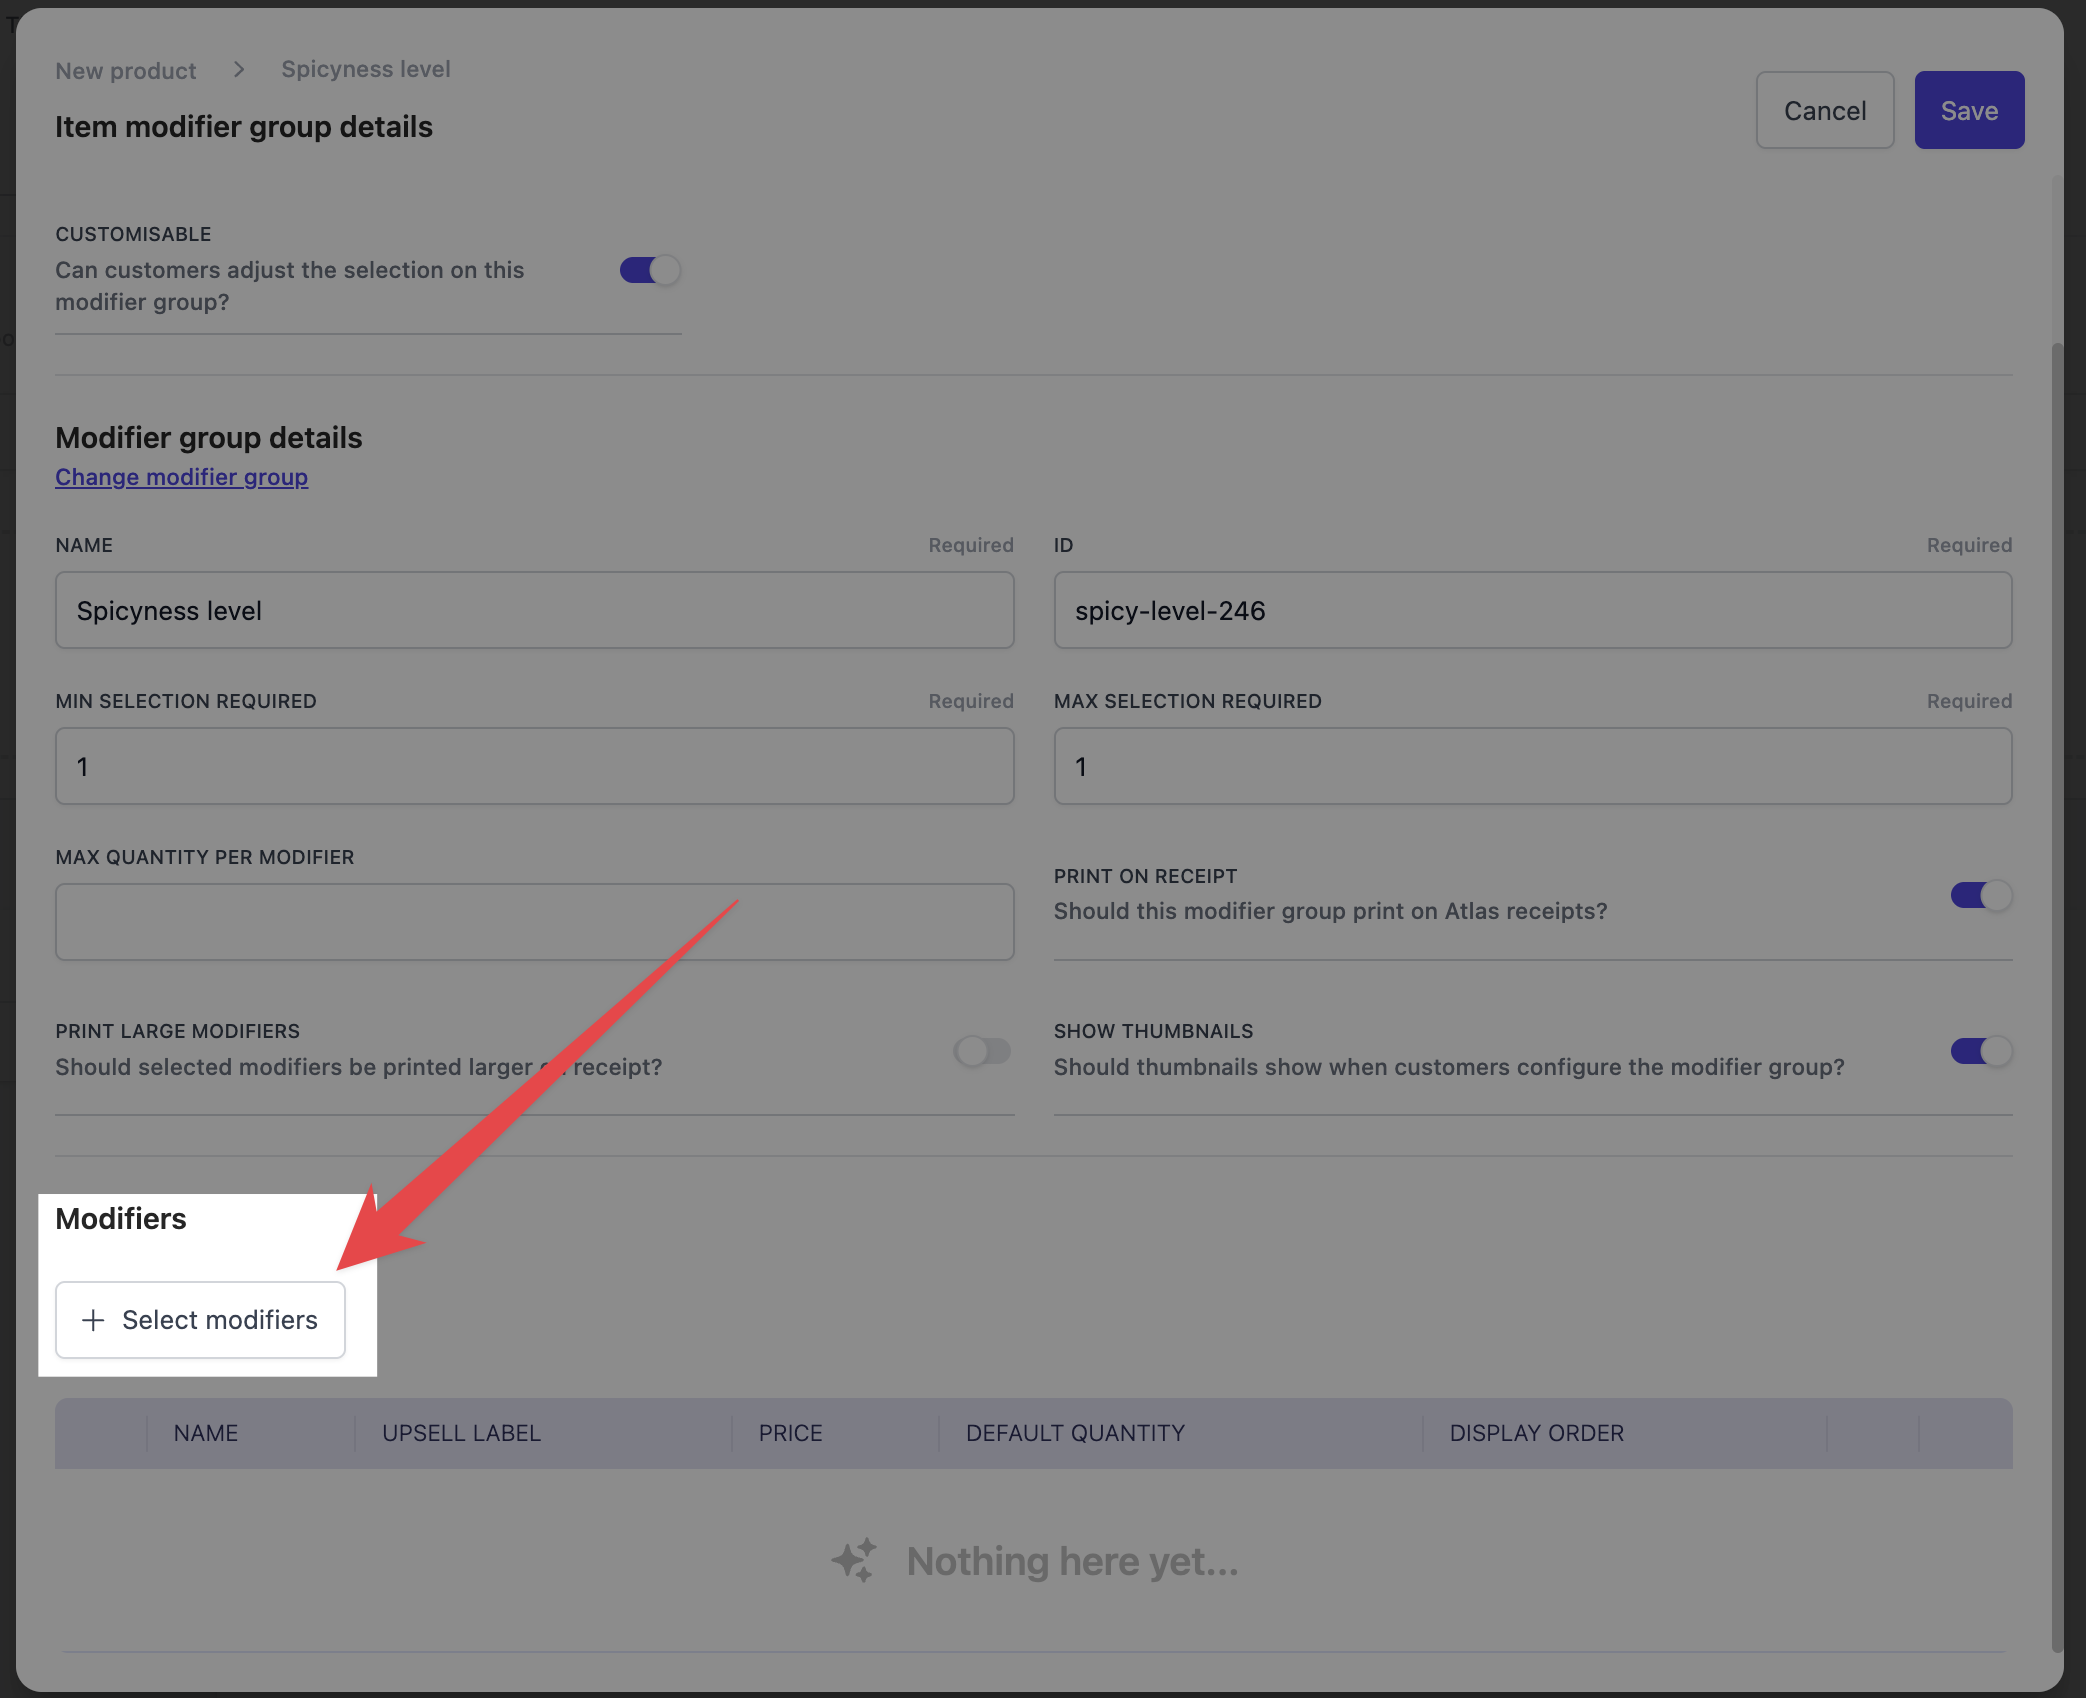
Tapping on “Create a new modifier group” will open the “Modifier group details” page. It will look like this: Fill in the details and tap on save to create a new modifier group. Best practice is to create an empty modifier group without modifiers first, save it, and edit it to add all its modifiers.
Let’s break it down:
Fill in the details and tap on save to create a new modifier group. Best practice is to create an empty modifier group without modifiers first, save it, and edit it to add all its modifiers.
Let’s break it down:
- Name (Required). Enter a name for the modifier group (e.g., “Choice of Sides”).
- ID. System-generated or custom identifier for the modifier group.
- Min selection required (Required). Set the minimum number of selections a customer must make. For example, if this is optional, set it to 0.
- Max selection required (Required). Set the maximum number of selections a customer can make.
- Max quantity per modifier. Define how many times a single modifier can be selected.
- Print on receipt. Enable if the modifier group should be printed on customer receipts. It should be on by default.
- Print large modifiers. Enable if selected modifiers should appear larger on receipts.
- Show thumbnails. Enable if modifier thumbnails photo should display.
- Select modifiers. Add individual modifiers to this group (e.g., “Extra Cheese,” “Spicy Level”).
Adding modifiers to a modifier group
A modifier is a single customisable component diners can select when ordering a product, that are housed inside Modifier groups. Modifiers can either be free (e.g., “No Onions”) or paid (e.g., “Extra Cheese +$1”). To add a modifier to a modifier group, follow these steps:Inside a product: Scroll down to "Modifier groups" > Tap on "Edit" modifier group.

Scroll down to Modifiers > Tap on "Select modifiers".
In the Modifier details page: Tap on "Add a product or component".
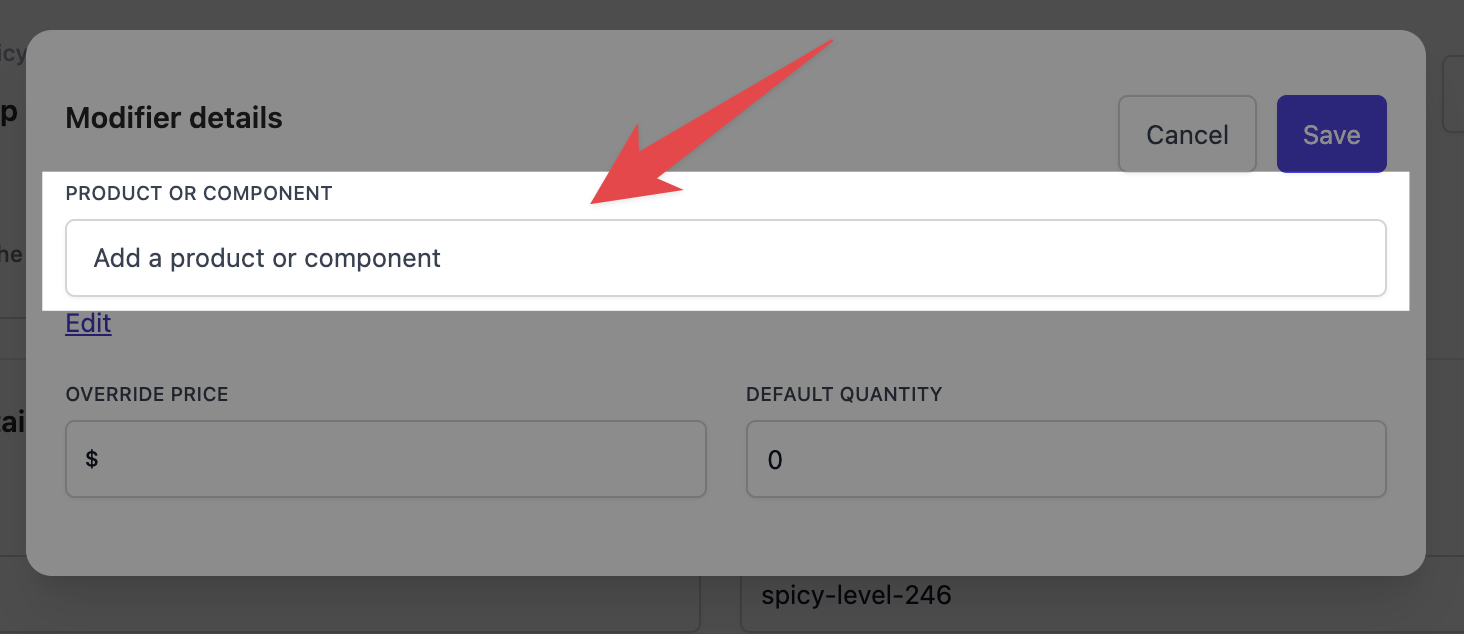
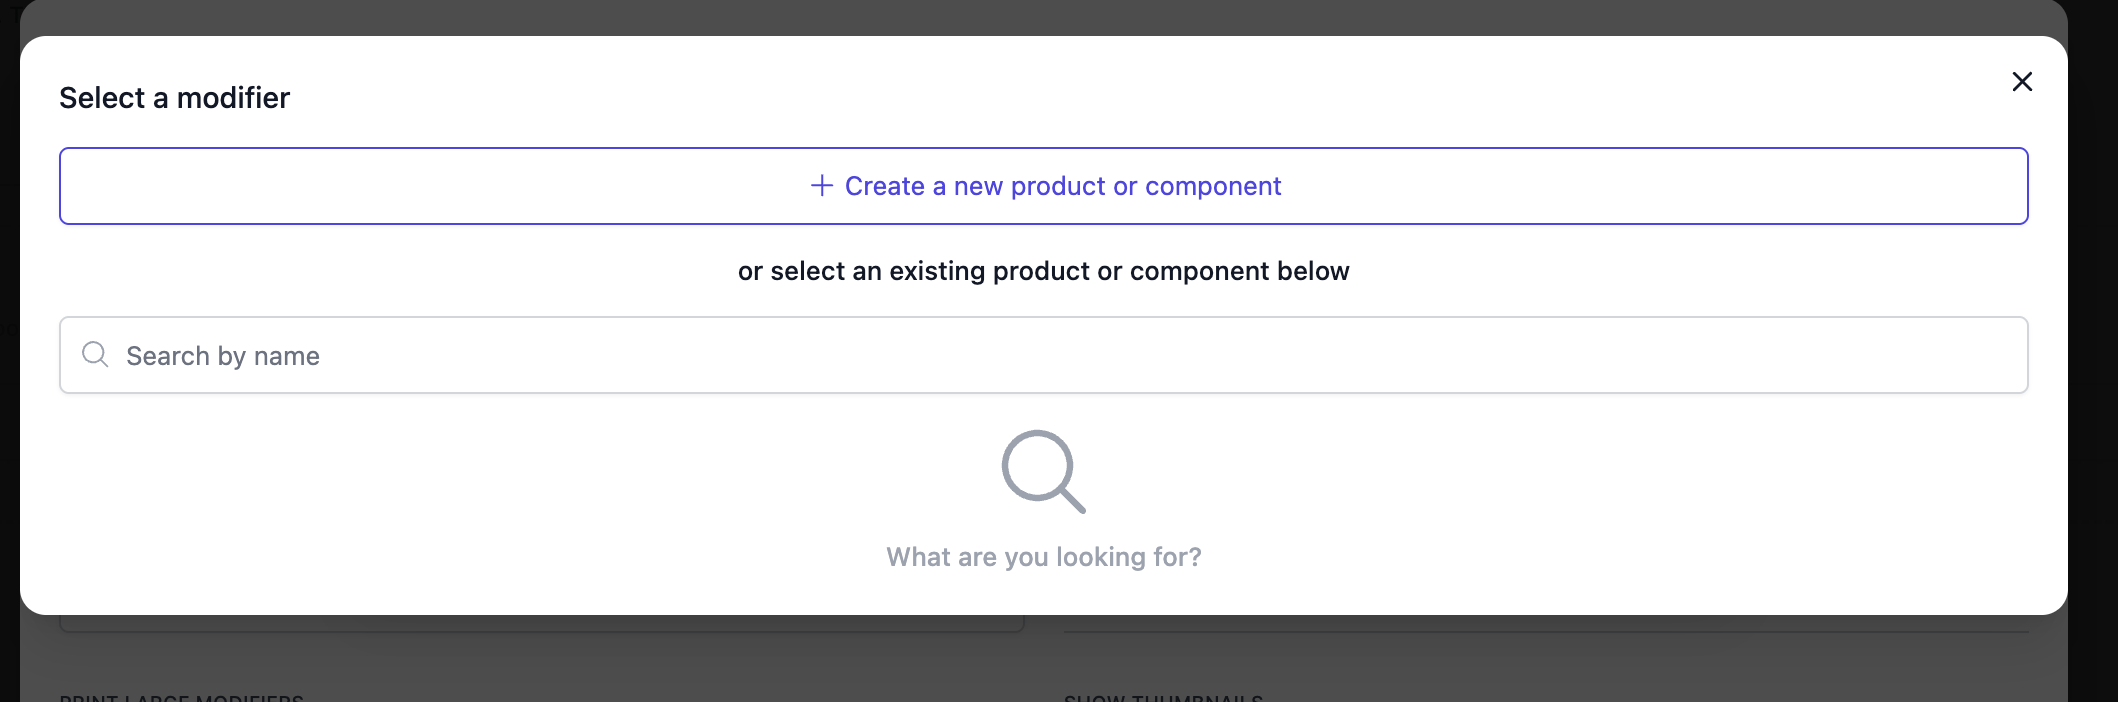
Tap on "Create a new product or component" to create and add a new modifier, or search by name and tap "Select" to add an existing one.
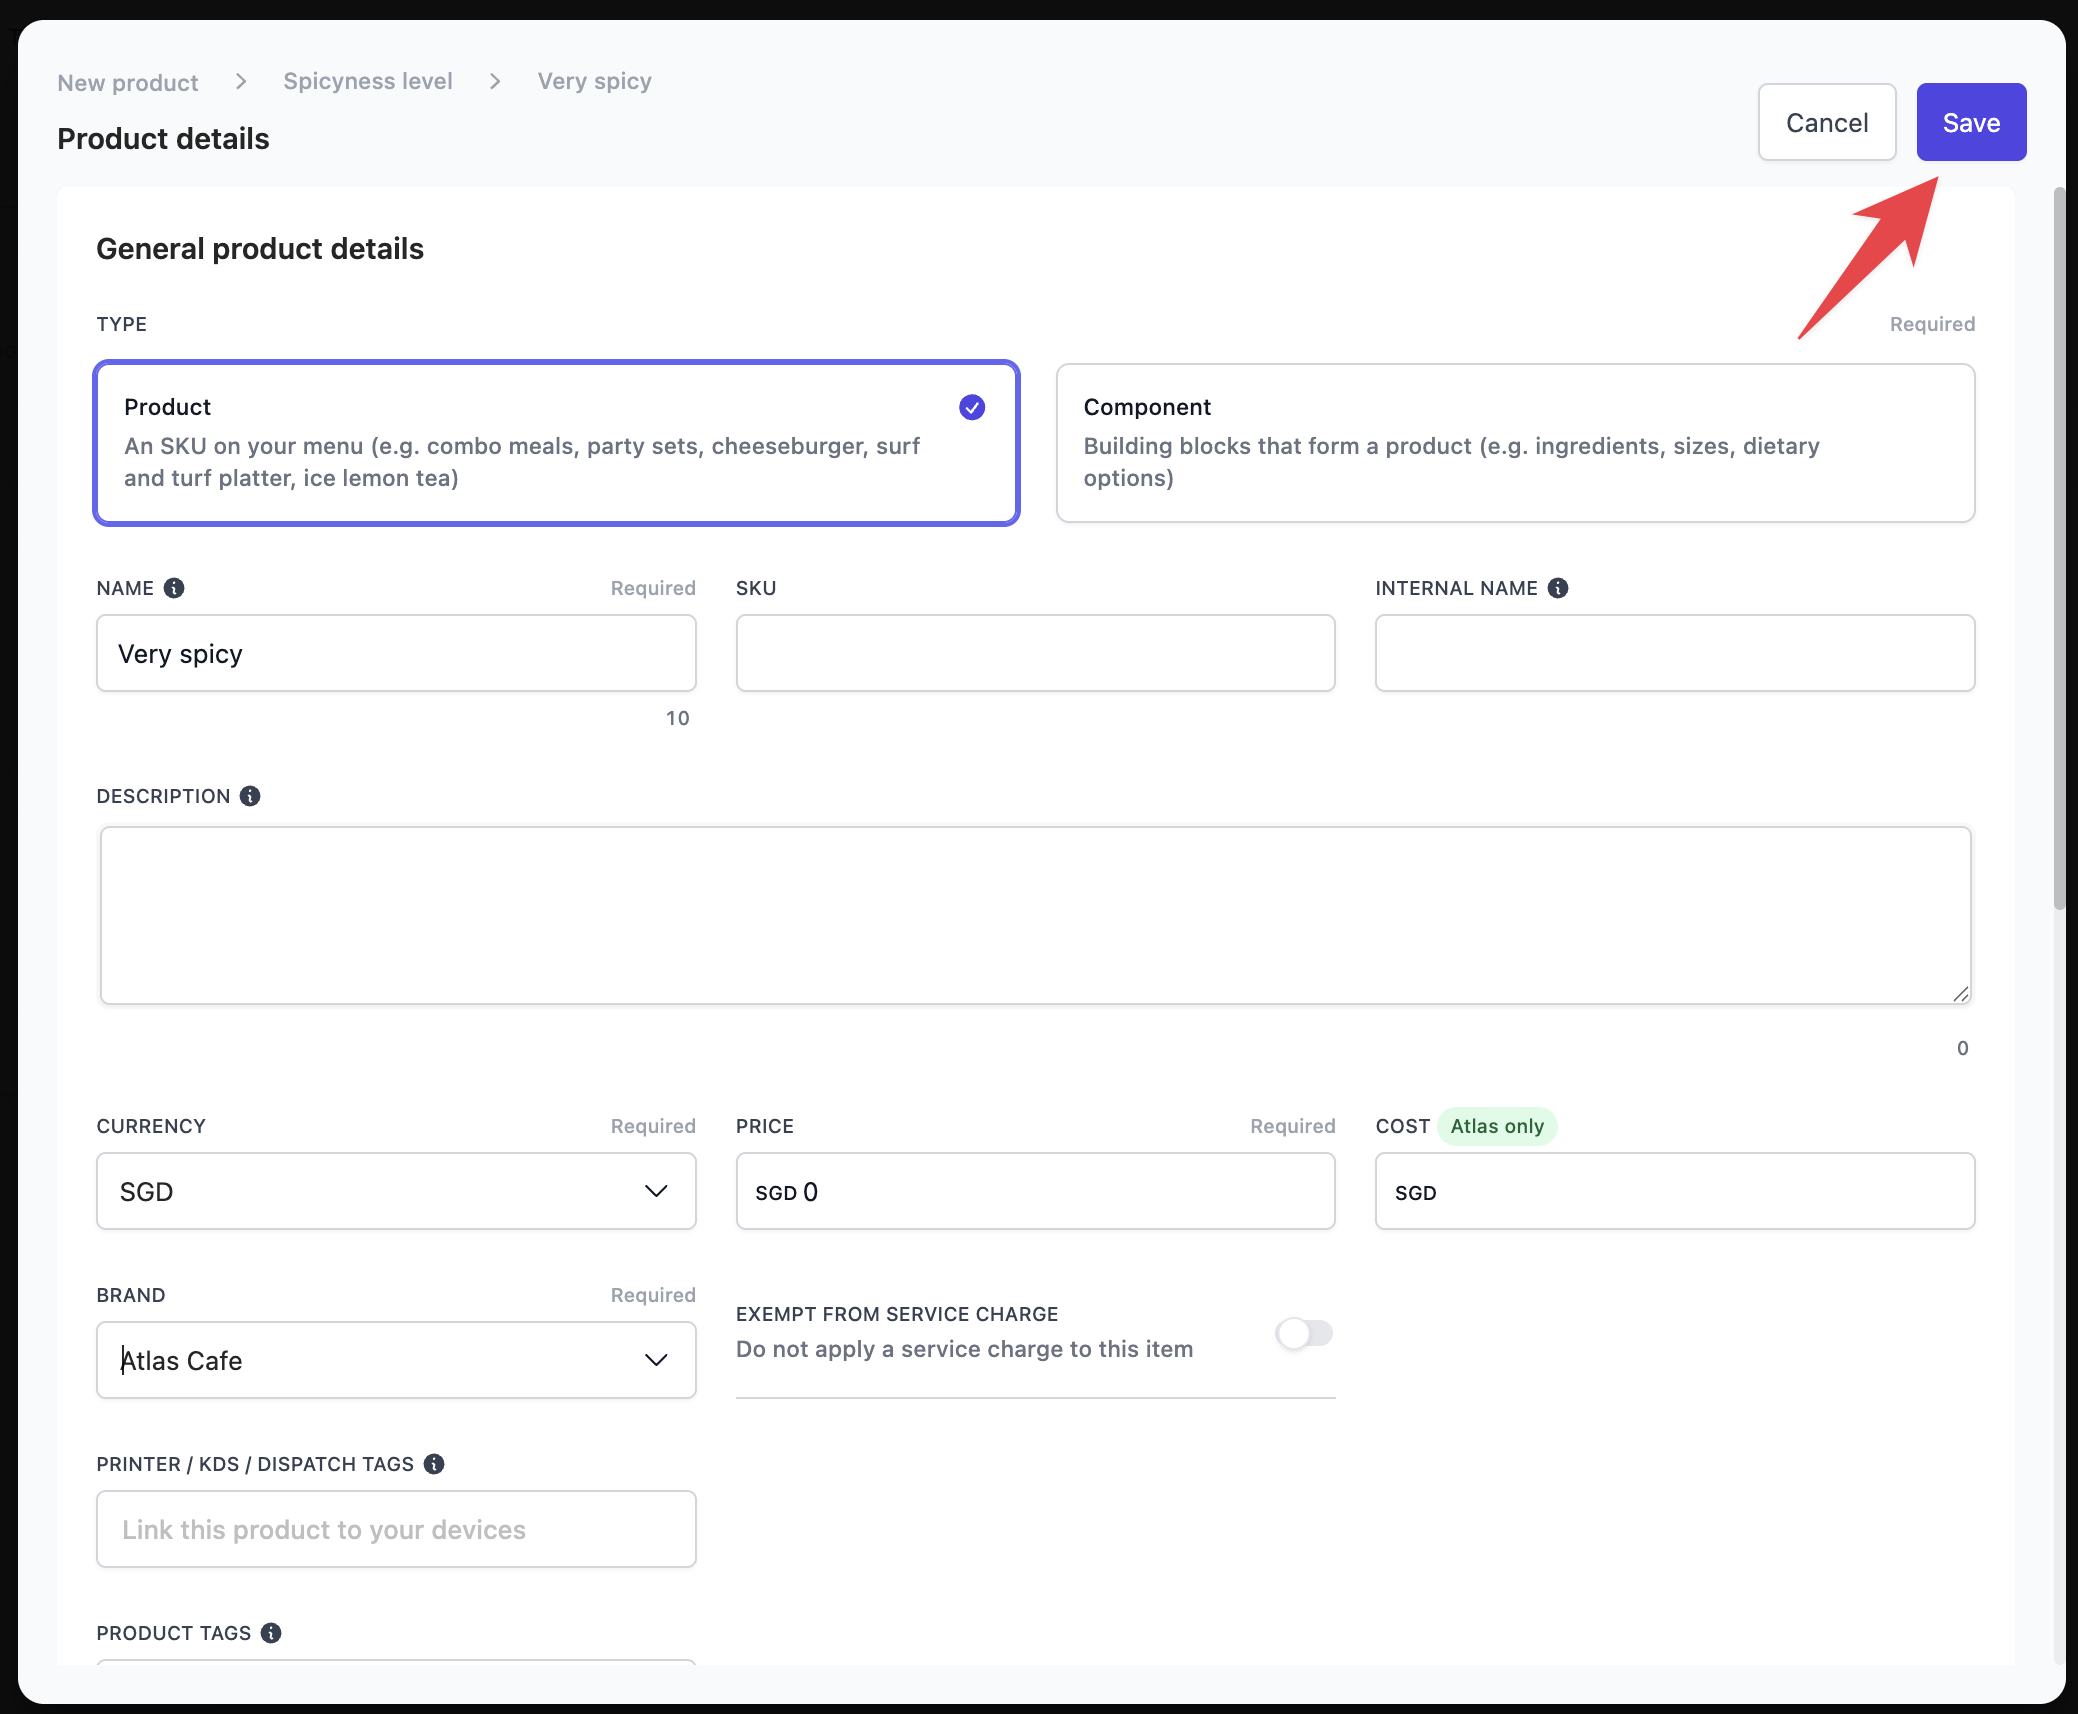
(If you create a new one) Fill up the product details > Tap on "Save".
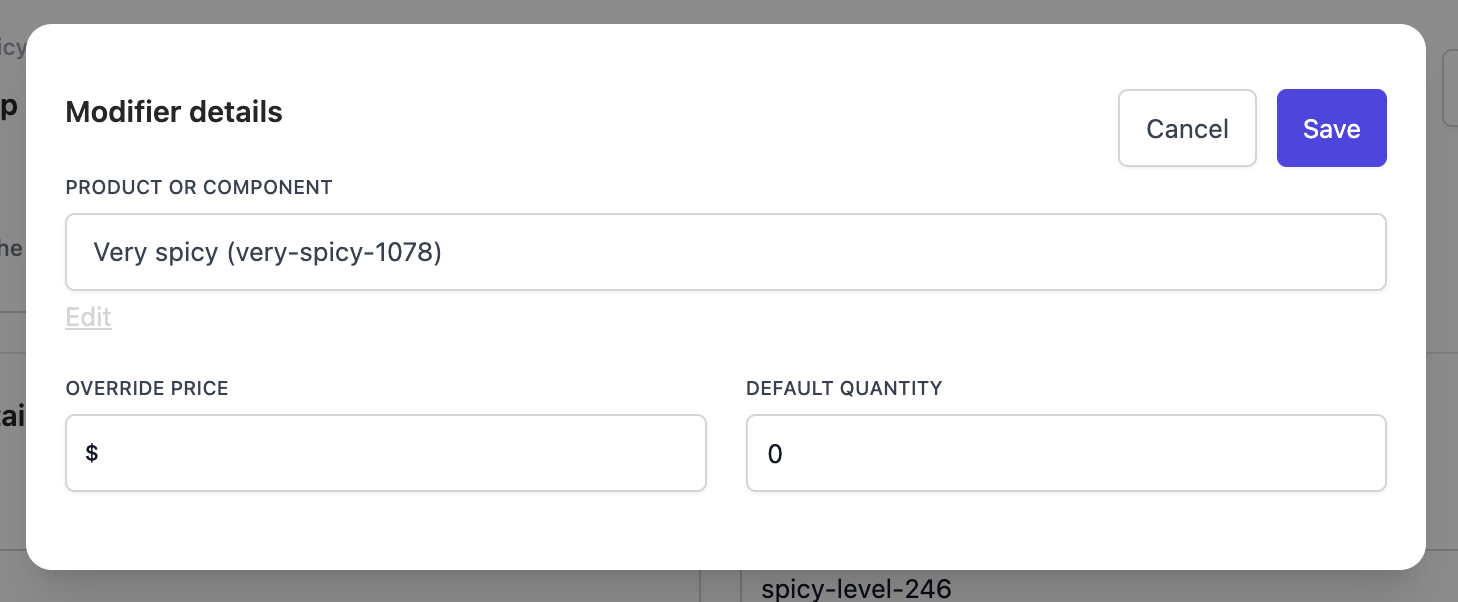
In the "Modifier details" page: "Override price" and add a "Default quantity" if needed > Tap on "Save".
- “Price override” replaces the original item’s price within the modifier group only. For example, selecting a drink inside a burger costs 3.90 when purchased a la carte.
- “Default quantity” assigns a pre-selected default quantity. For example, this is useful for bundles when a few items are included by default.