> ## Documentation Index
> Fetch the complete documentation index at: https://help.atlas.kitchen/llms.txt
> Use this file to discover all available pages before exploring further.
# Set up POS layouts
> Create and customise Atlas POS layouts. Add pages, configure product and discount tiles, and assign layouts to specific outlets for efficient ordering.
**Who is this guide for?**
* Atlas users with Admin or Manager permissions. Set permissions from **Settings > Team members**.
* Users subscribed to Atlas POS.
## Before you begin
This guide will walk you through setting up and customising your POS layouts in Atlas. You'll learn how to create layouts, add pages, configure different tile types, and assign layouts to specific outlets.
## Creating a POS layout
A POS layout organises how your menu and ordering interface appear on Atlas POS. Creating a layout allows you to customise navigation and product placement for your team.
Follow these steps to set up a new layout:
 ## Adding pages to a POS layout
Pages help organise different sections of your POS layout, allowing for easy navigation and a structured menu.
Follow these steps to add new pages to your layout:
## Adding pages to a POS layout
Pages help organise different sections of your POS layout, allowing for easy navigation and a structured menu.
Follow these steps to add new pages to your layout:
 If there are too many pages, scroll horizontally to find it, as it will be at the end. You might resort the page by tapping and dragging it too.
You might start adding product or discount tiles in this new page (see next section).
## Adding tiles to your POS
Tiles represent products, discounts, or navigation folders within your POS layout.
Follow these steps to add new tiles to your layout:
If there are too many pages, scroll horizontally to find it, as it will be at the end. You might resort the page by tapping and dragging it too.
If there are too many pages, scroll horizontally to find it, as it will be at the end. You might resort the page by tapping and dragging it too.
You might start adding product or discount tiles in this new page (see next section).
## Adding tiles to your POS
Tiles represent products, discounts, or navigation folders within your POS layout.
Follow these steps to add new tiles to your layout:
If there are too many pages, scroll horizontally to find it, as it will be at the end. You might resort the page by tapping and dragging it too.
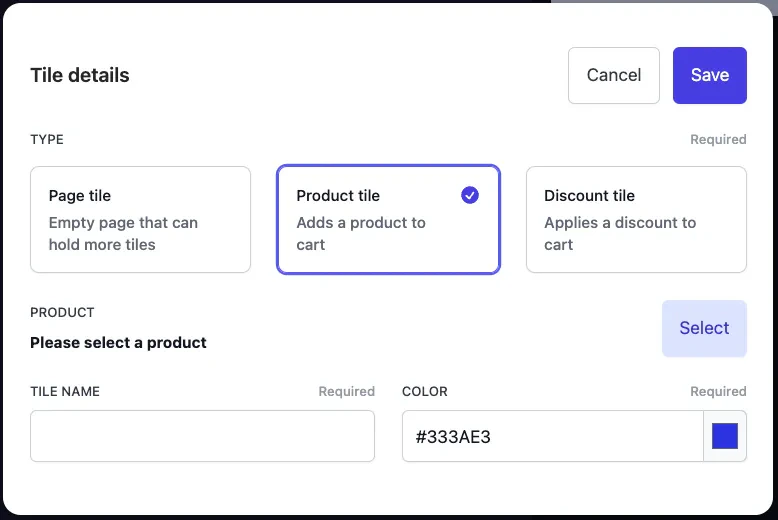 * **Page tile** creates an empty folder, for you to add items inside it. Click on it after you've created it to open it.
* **Product tile** links to an existing product. It's the most common one. An additional "Select" button will display to select the right product.
* **Discount tile** links to an existing discount. An additional "Select" button will display to select the discount.
Note you can also enter your own colour code, or tap on the colour to select a predefined one.
It's best to use darker colours for better visibility (text is white).
## Assigning POS layouts to different outlets
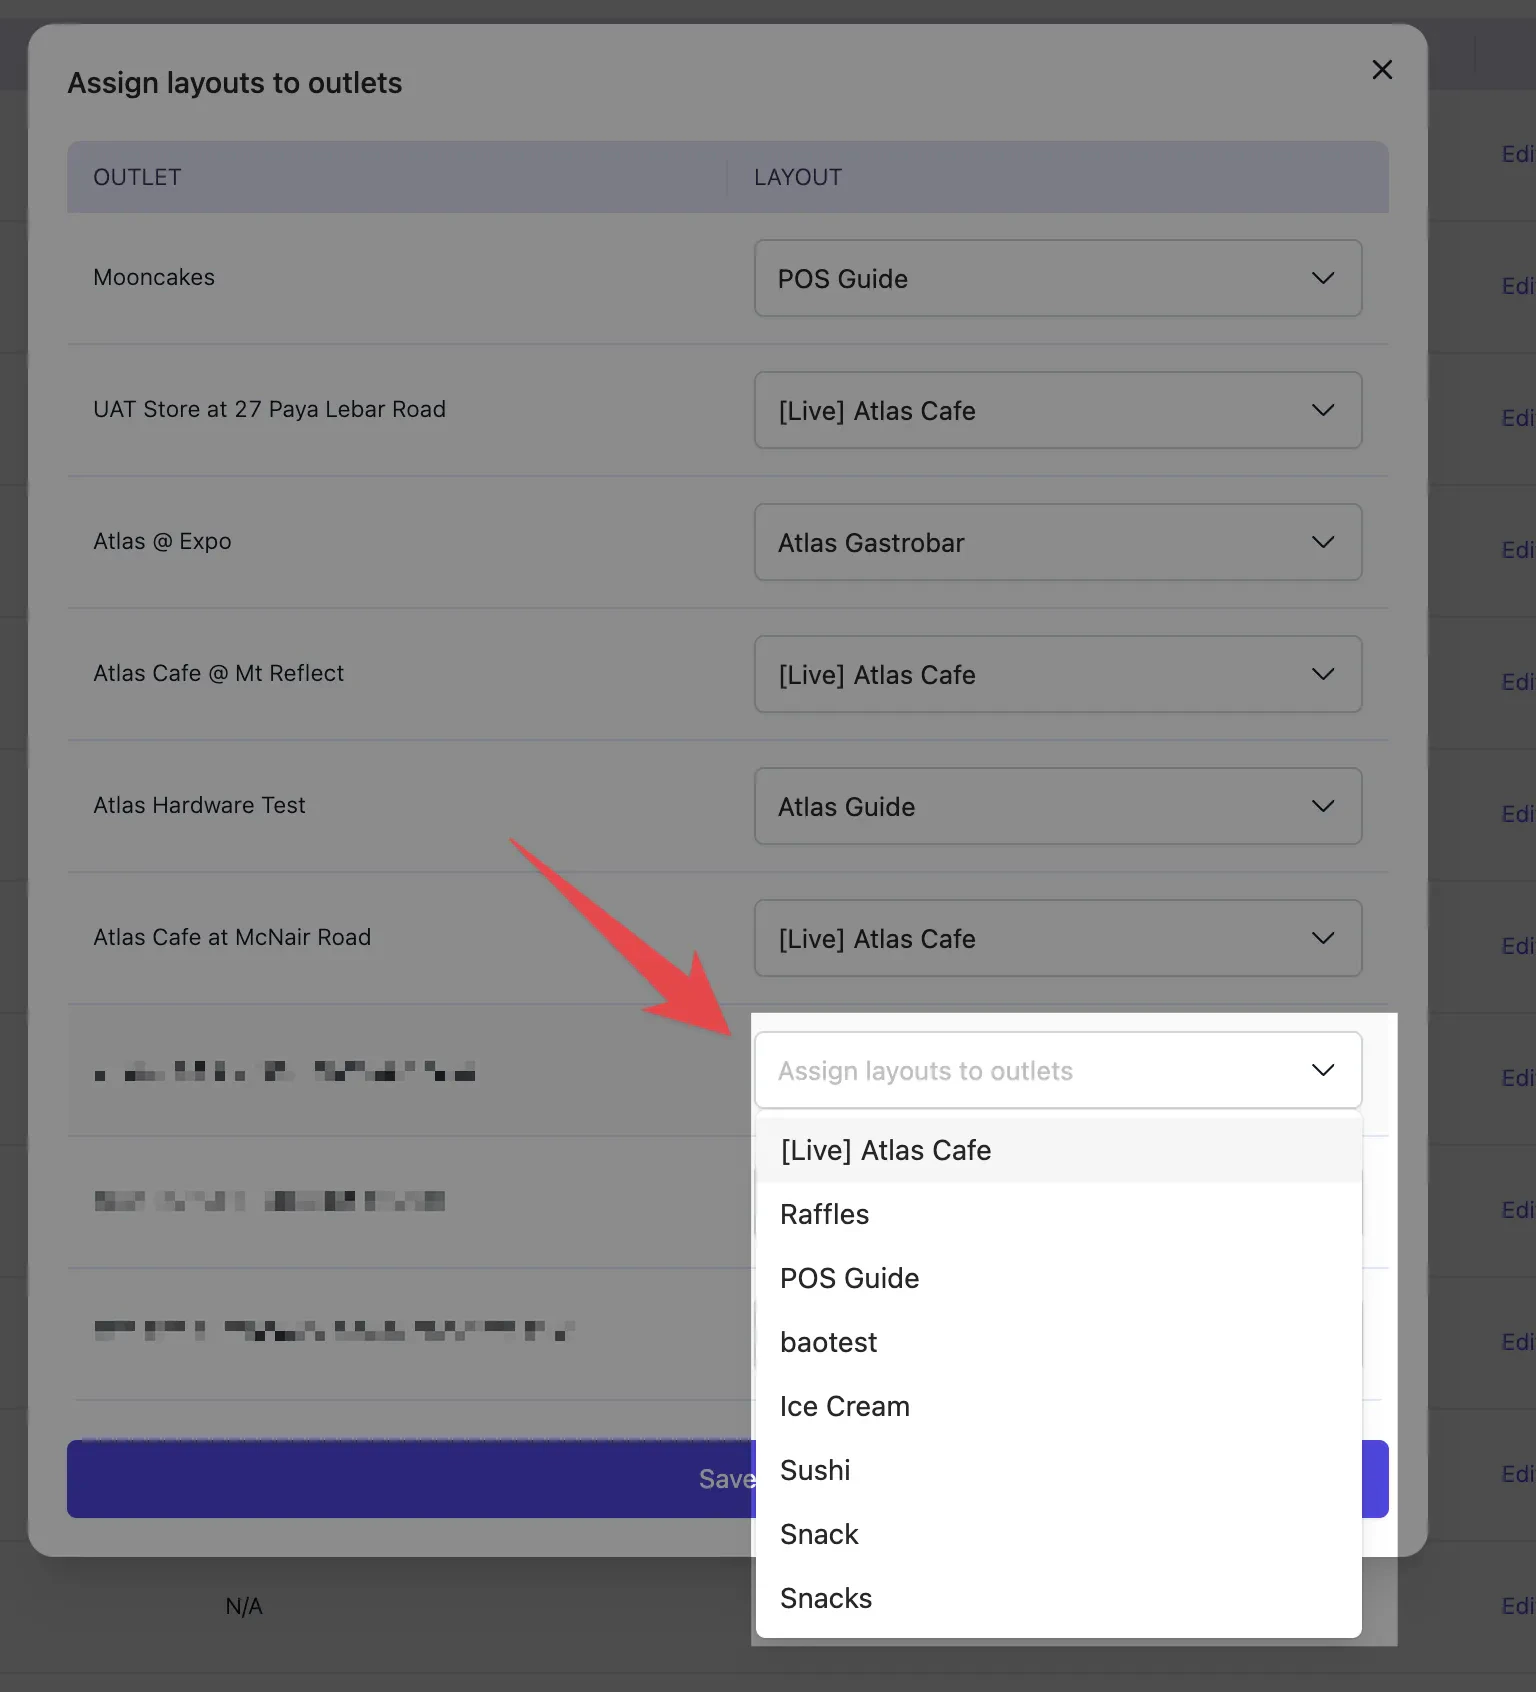
If you manage multiple outlets, you can assign specific POS layouts to each location to ensure the correct menu and configurations are in place.
Follow these steps to set up POS layout assignments:
* **Page tile** creates an empty folder, for you to add items inside it. Click on it after you've created it to open it.
* **Product tile** links to an existing product. It's the most common one. An additional "Select" button will display to select the right product.
* **Discount tile** links to an existing discount. An additional "Select" button will display to select the discount.
Note you can also enter your own colour code, or tap on the colour to select a predefined one.
It's best to use darker colours for better visibility (text is white).
## Assigning POS layouts to different outlets
If you manage multiple outlets, you can assign specific POS layouts to each location to ensure the correct menu and configurations are in place.
Follow these steps to set up POS layout assignments: