> ## Documentation Index
> Fetch the complete documentation index at: https://help.atlas.kitchen/llms.txt
> Use this file to discover all available pages before exploring further.
# Translate your menu
> Show a language toggle on your online ordering, scan-to-order, and kiosk menus, and add Chinese translations with a CSV upload.
## What this does
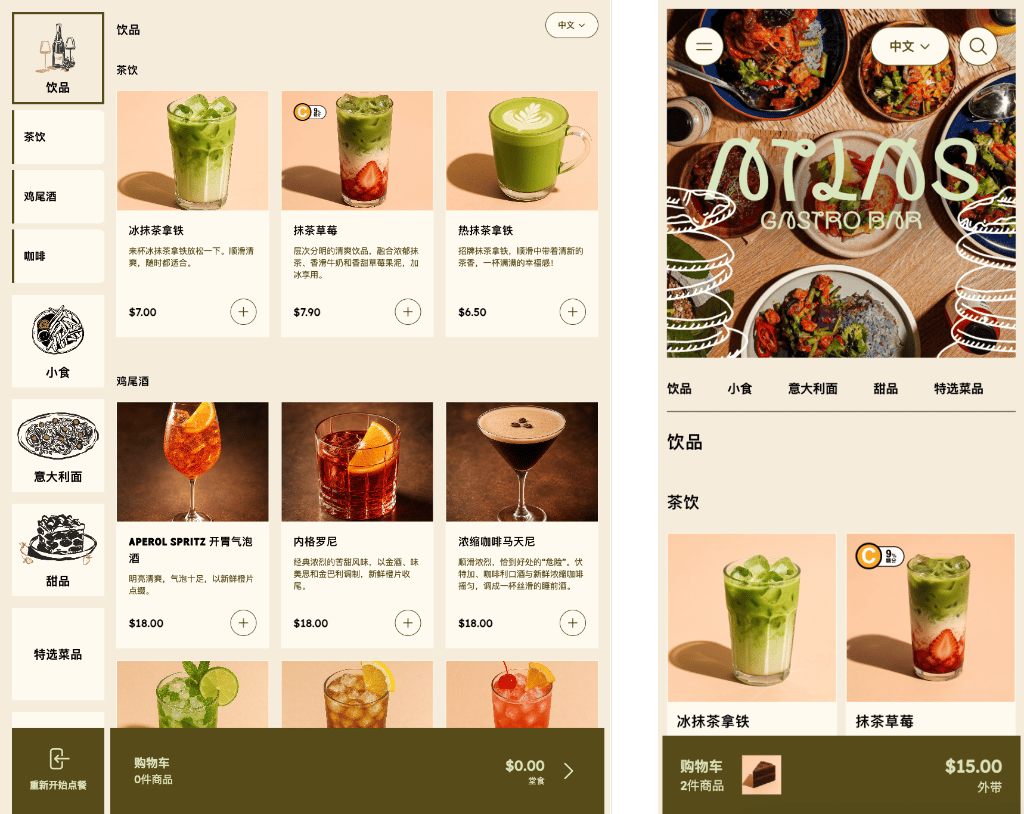
Diners see a language toggle on your online ordering website, scan-to-order (STO), and kiosk menus. They can switch the menu between English and Chinese (中文).
You provide the Chinese text yourself. Download a translation sheet for your menu, fill in the Chinese columns, and upload it. Atlas shows the Chinese version when a diner picks 中文.
 ## Before you start
* You need a menu set up in Atlas. See [Create menus](/menu-builder/create-menus).
* The toggle appears on your **online ordering website**, **scan-to-order**, and **kiosk** channels. It does not appear on POS or printed receipts.
* The only supported second language is Chinese (Simplified).
## Part 1: Add Chinese translations to your menu
In the Merchant Portal, open **Menus**. Find the menu you want to translate.
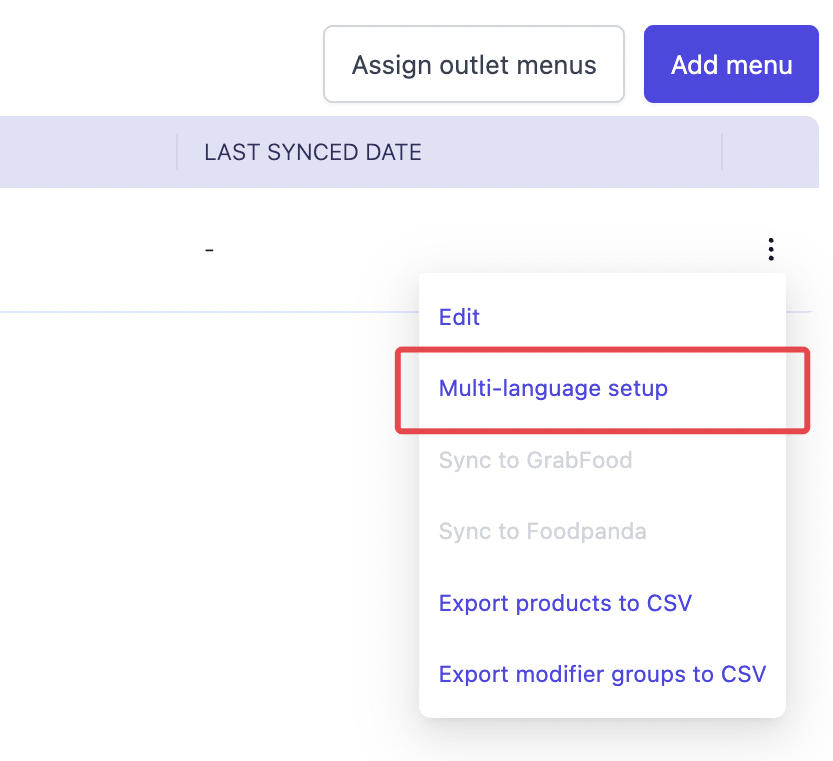
Tap the actions menu (⋮) on that menu's row, then tap **Multi-language setup**.
## Before you start
* You need a menu set up in Atlas. See [Create menus](/menu-builder/create-menus).
* The toggle appears on your **online ordering website**, **scan-to-order**, and **kiosk** channels. It does not appear on POS or printed receipts.
* The only supported second language is Chinese (Simplified).
## Part 1: Add Chinese translations to your menu
In the Merchant Portal, open **Menus**. Find the menu you want to translate.
Tap the actions menu (⋮) on that menu's row, then tap **Multi-language setup**.
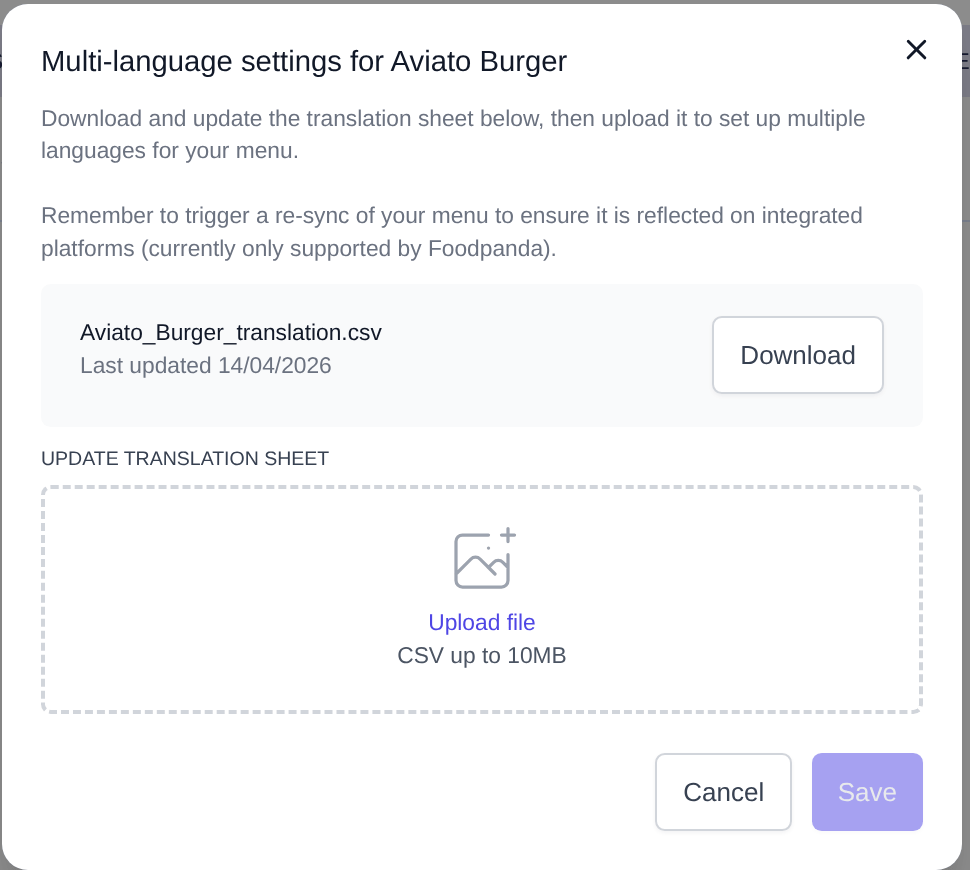
 Tap **Download**. You get a CSV file named after your menu (e.g. `Dinner_menu_translation.csv`). The modal also shows the date the sheet was last updated.
 Open the CSV in Excel or Google Sheets. Every menu, section, item, and modifier group is a row.
* Fill in **Title (zh)** with the Chinese name.
* Fill in **Description (zh)** with the Chinese description, if the item has one.
* Leave a cell blank to keep showing the default (English) text for it.
Back in the same modal, drag the CSV into the upload area or tap to browse, then tap **Save**.
Do not change the **Source type** and **Source ID** columns. Atlas uses them to match each row back to the right item. Also leave **Title (default)** and **Description (default)** unchanged unless you mean to rename the item itself. These columns overwrite the item's real name and description everywhere, not just the translation.
## Part 2: Show the language toggle to diners
How you turn on the toggle depends on the channel.
**Online ordering website:** the toggle is switched on at the account level. Contact support at [hello@atlas.kitchen](mailto:hello@atlas.kitchen) to enable it.
**Scan-to-order and kiosk:** turn it on yourself in the channel link settings.
Go to **Scan to Order** or **Kiosks**, then open the channel link your menu is on for editing.
Scroll to **Enable language toggle** under General details and turn the switch on.
Open the CSV in Excel or Google Sheets. Every menu, section, item, and modifier group is a row.
* Fill in **Title (zh)** with the Chinese name.
* Fill in **Description (zh)** with the Chinese description, if the item has one.
* Leave a cell blank to keep showing the default (English) text for it.
Back in the same modal, drag the CSV into the upload area or tap to browse, then tap **Save**.
Do not change the **Source type** and **Source ID** columns. Atlas uses them to match each row back to the right item. Also leave **Title (default)** and **Description (default)** unchanged unless you mean to rename the item itself. These columns overwrite the item's real name and description everywhere, not just the translation.
## Part 2: Show the language toggle to diners
How you turn on the toggle depends on the channel.
**Online ordering website:** the toggle is switched on at the account level. Contact support at [hello@atlas.kitchen](mailto:hello@atlas.kitchen) to enable it.
**Scan-to-order and kiosk:** turn it on yourself in the channel link settings.
Go to **Scan to Order** or **Kiosks**, then open the channel link your menu is on for editing.
Scroll to **Enable language toggle** under General details and turn the switch on.
 Choose **English** or **中文 (Chinese)**. This is the language diners see first when they open the menu.
Tap **Save**. The toggle appears on your menu within a few minutes.
## Next steps
* [Create menus](/menu-builder/create-menus) — build and edit your menus.
* [Change the portal language](/merchant-portal/language-switcher) — switch the Merchant Portal's own interface to Chinese.
This documentation is built and hosted on [Mintlify](https://mintlify.com), a developer documentation platform.
Choose **English** or **中文 (Chinese)**. This is the language diners see first when they open the menu.
Tap **Save**. The toggle appears on your menu within a few minutes.
## Next steps
* [Create menus](/menu-builder/create-menus) — build and edit your menus.
* [Change the portal language](/merchant-portal/language-switcher) — switch the Merchant Portal's own interface to Chinese.
This documentation is built and hosted on [Mintlify](https://mintlify.com), a developer documentation platform.